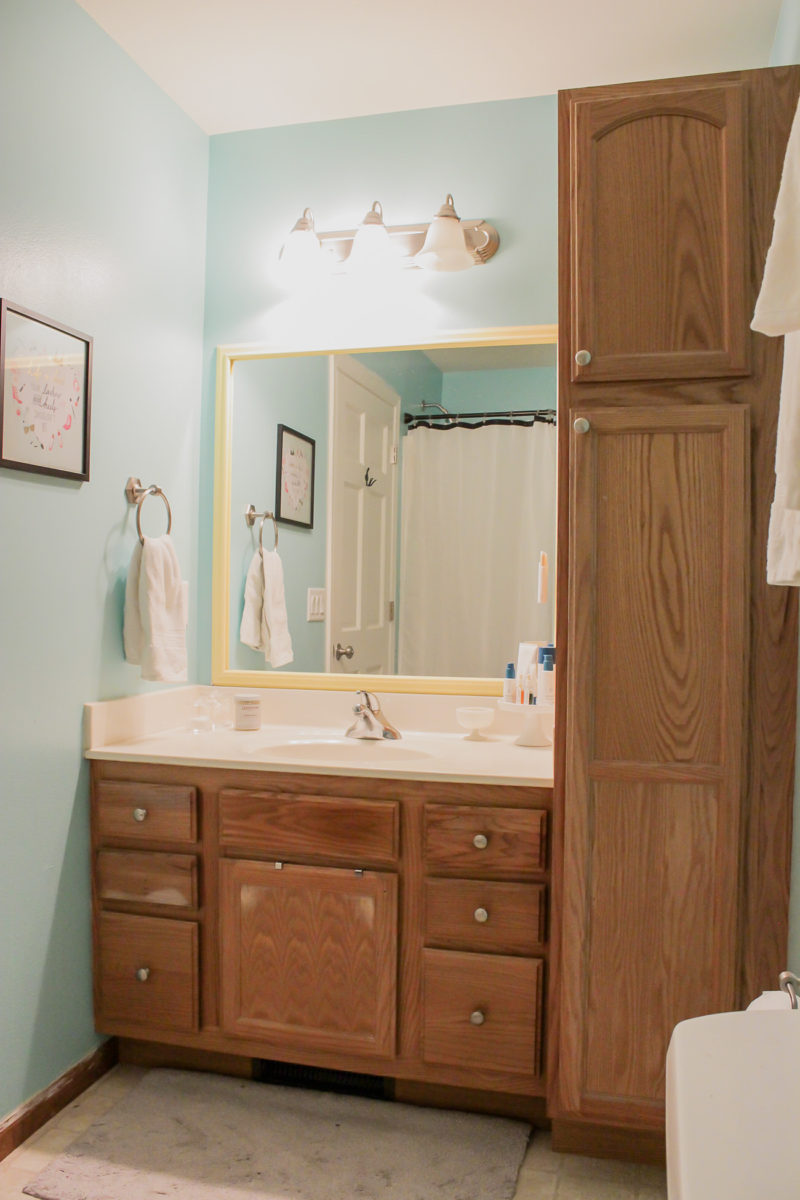
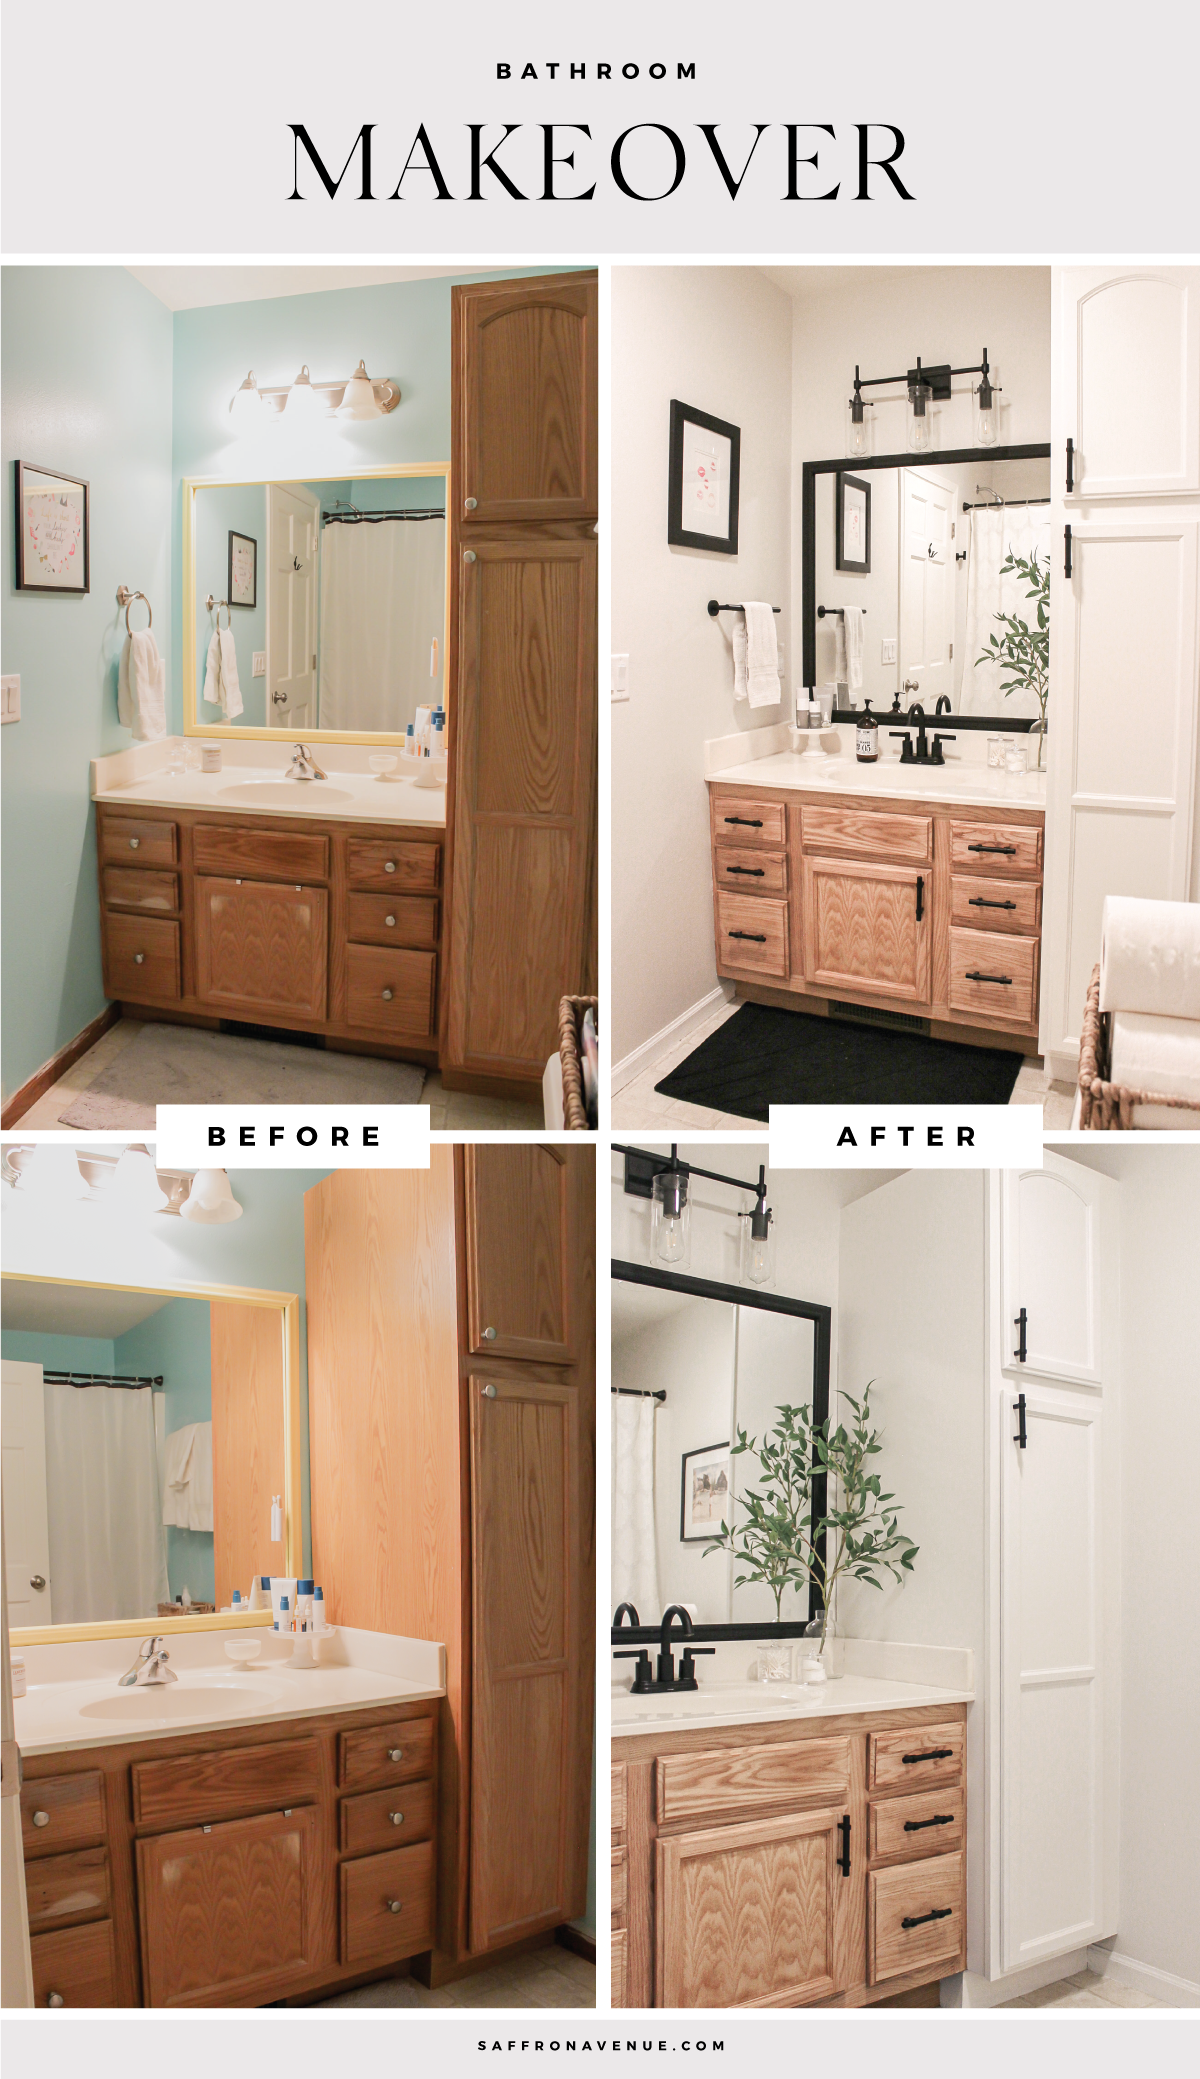
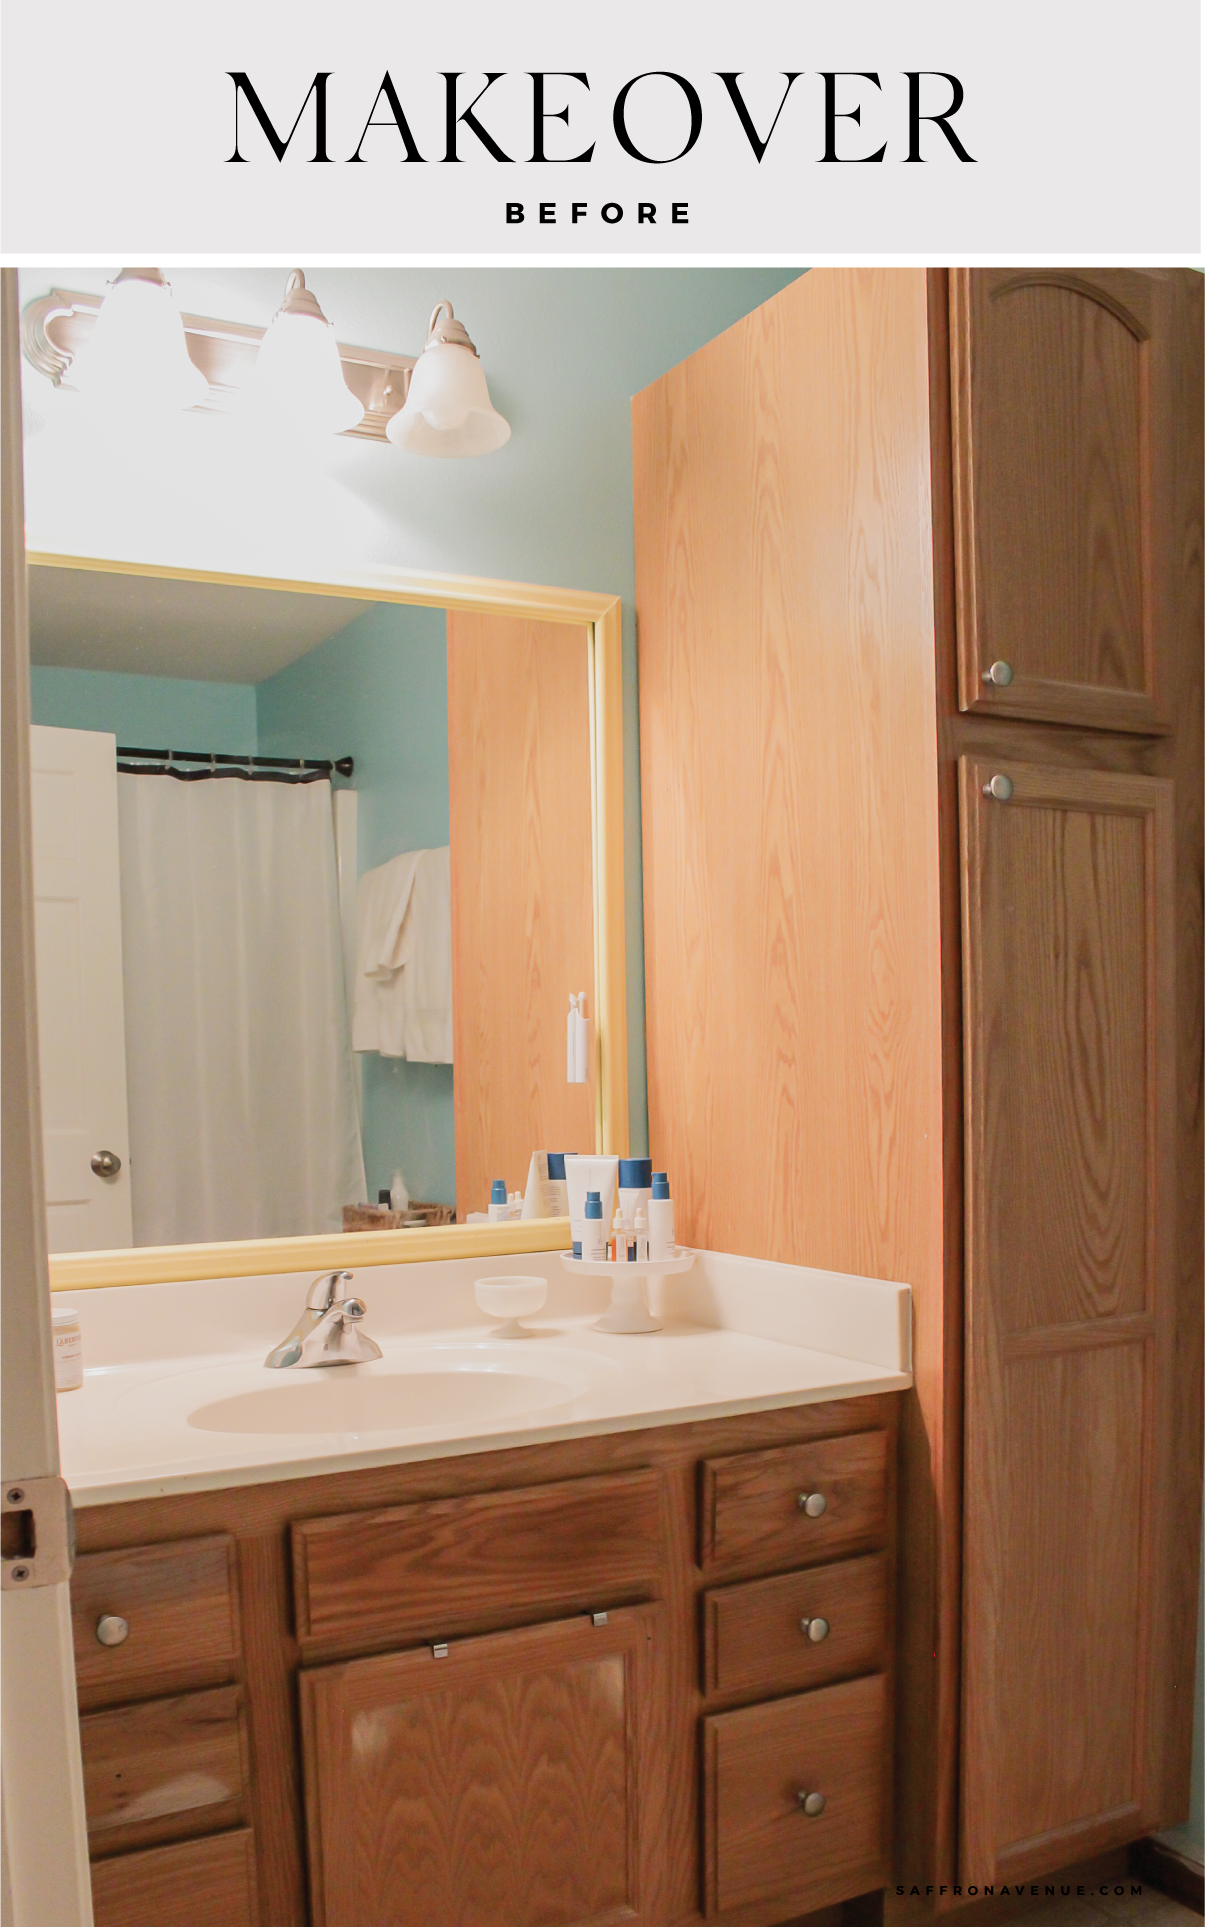
Let me just start out by saying that I waited WAY too long to do our bathroom makeover. Yep, I got ready for 4 years in that turquoise and yellow bathroom..what!?. Although this isn’t a huge bathroom renovation or big budget makeover..it is still quite the before and after if I say so myself!
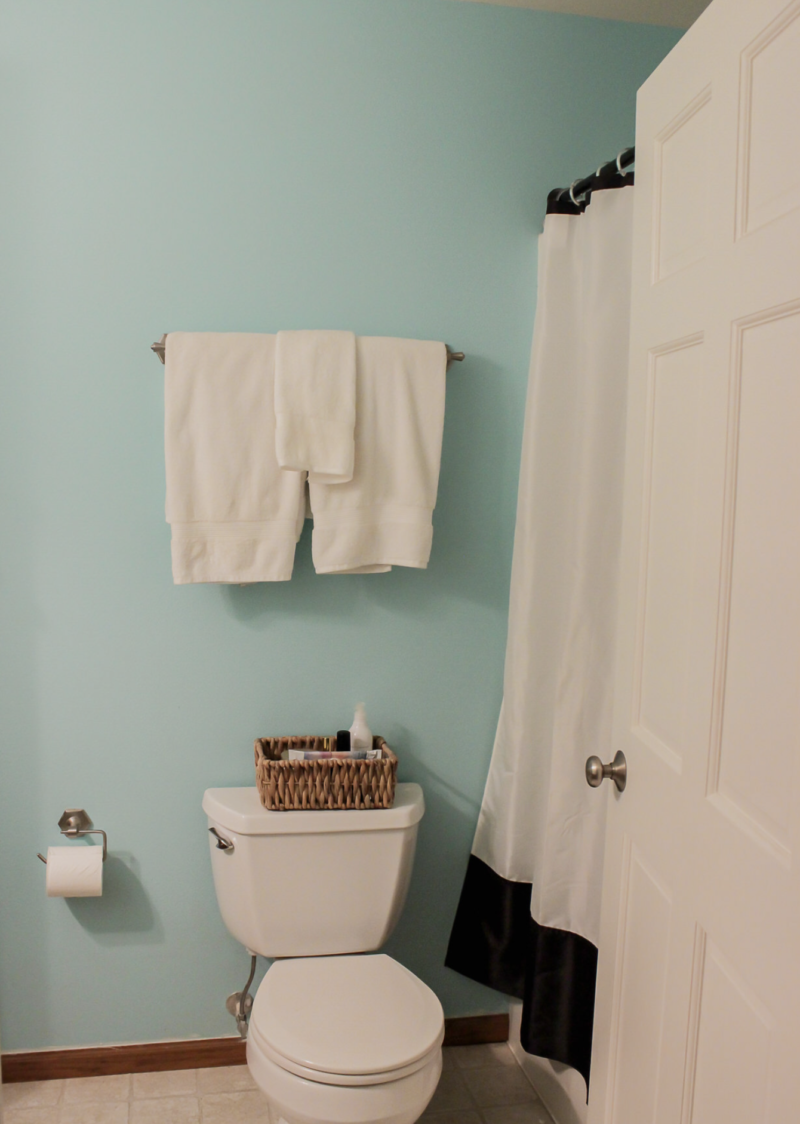
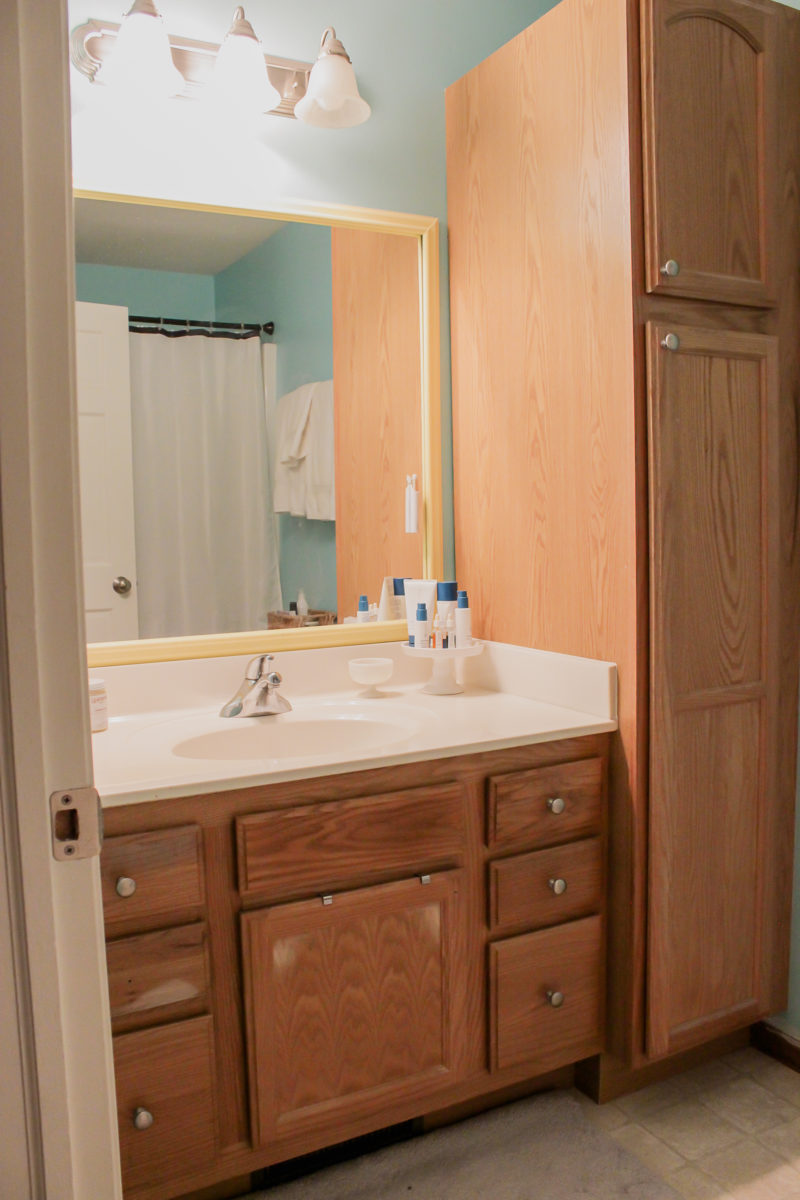
The BEFORE
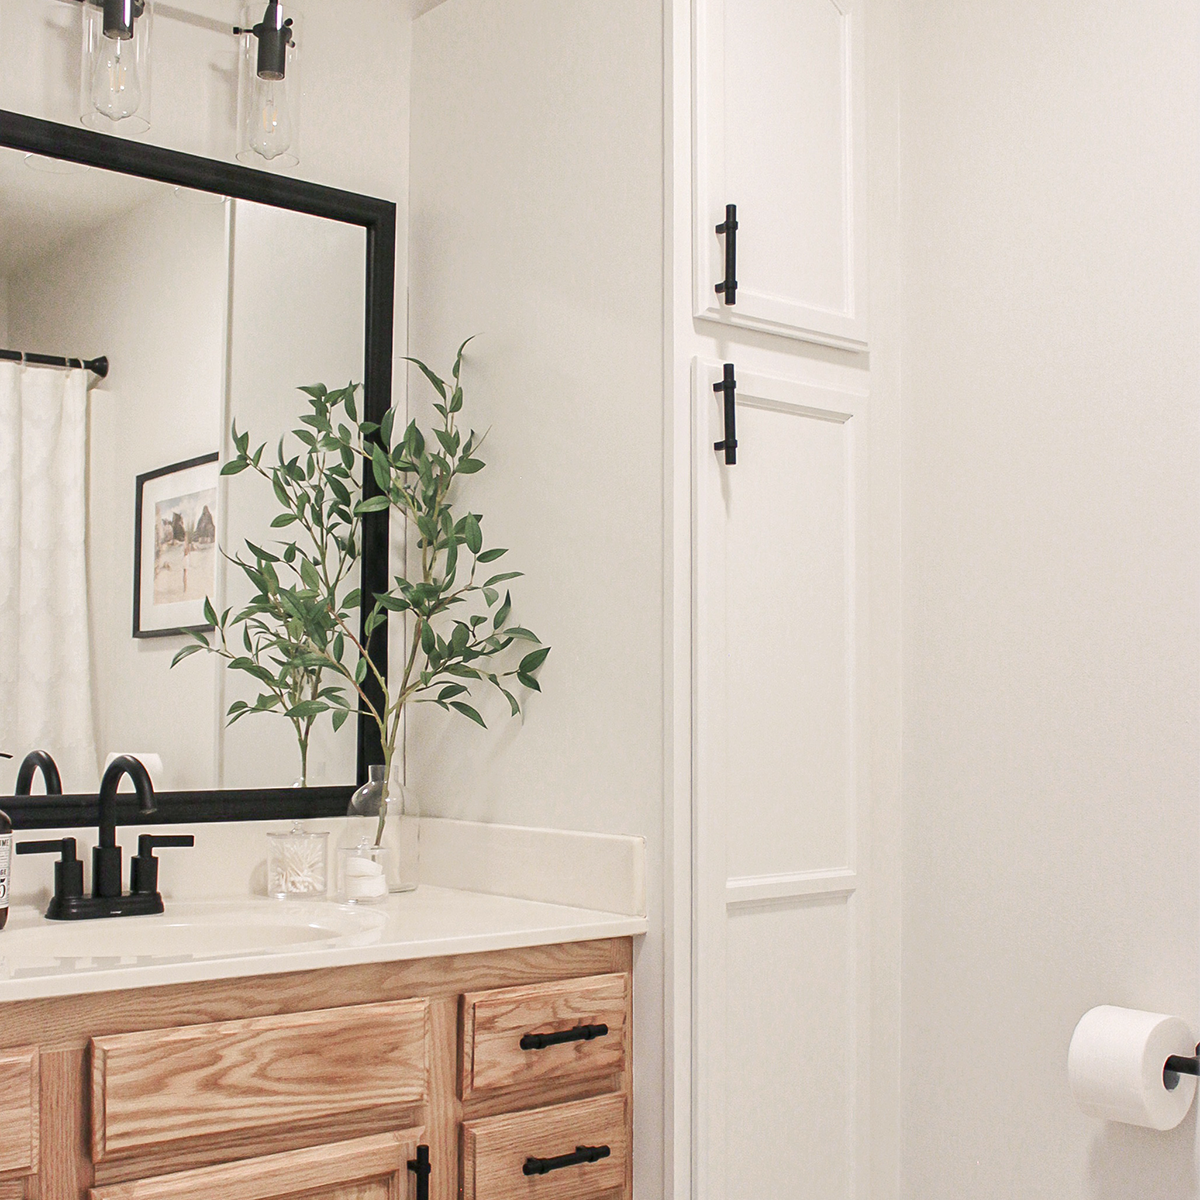
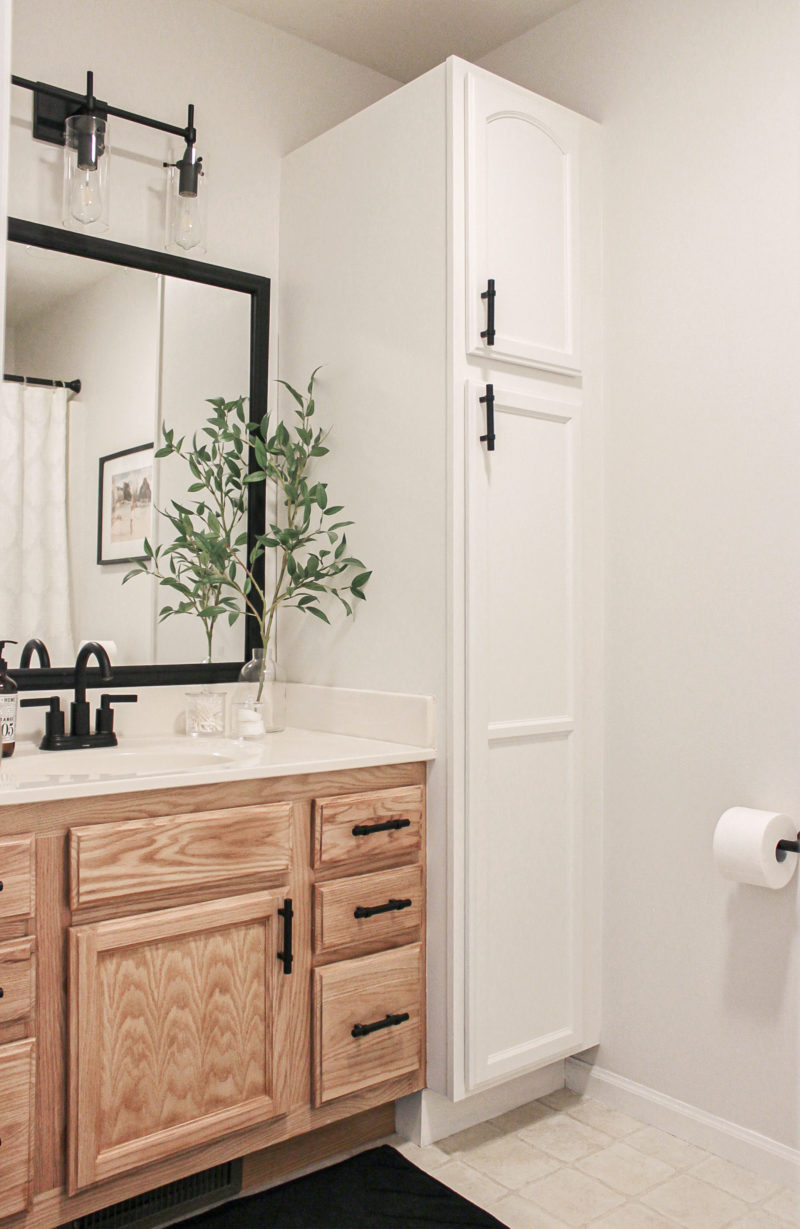
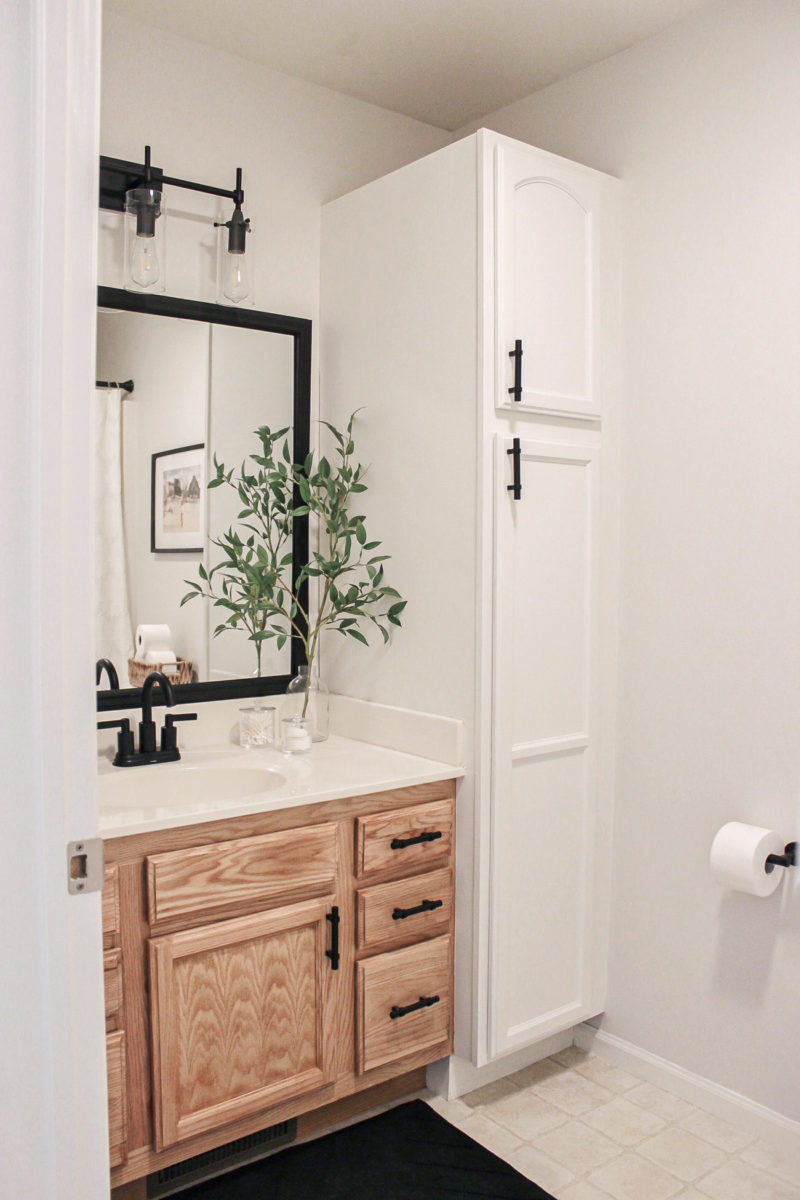
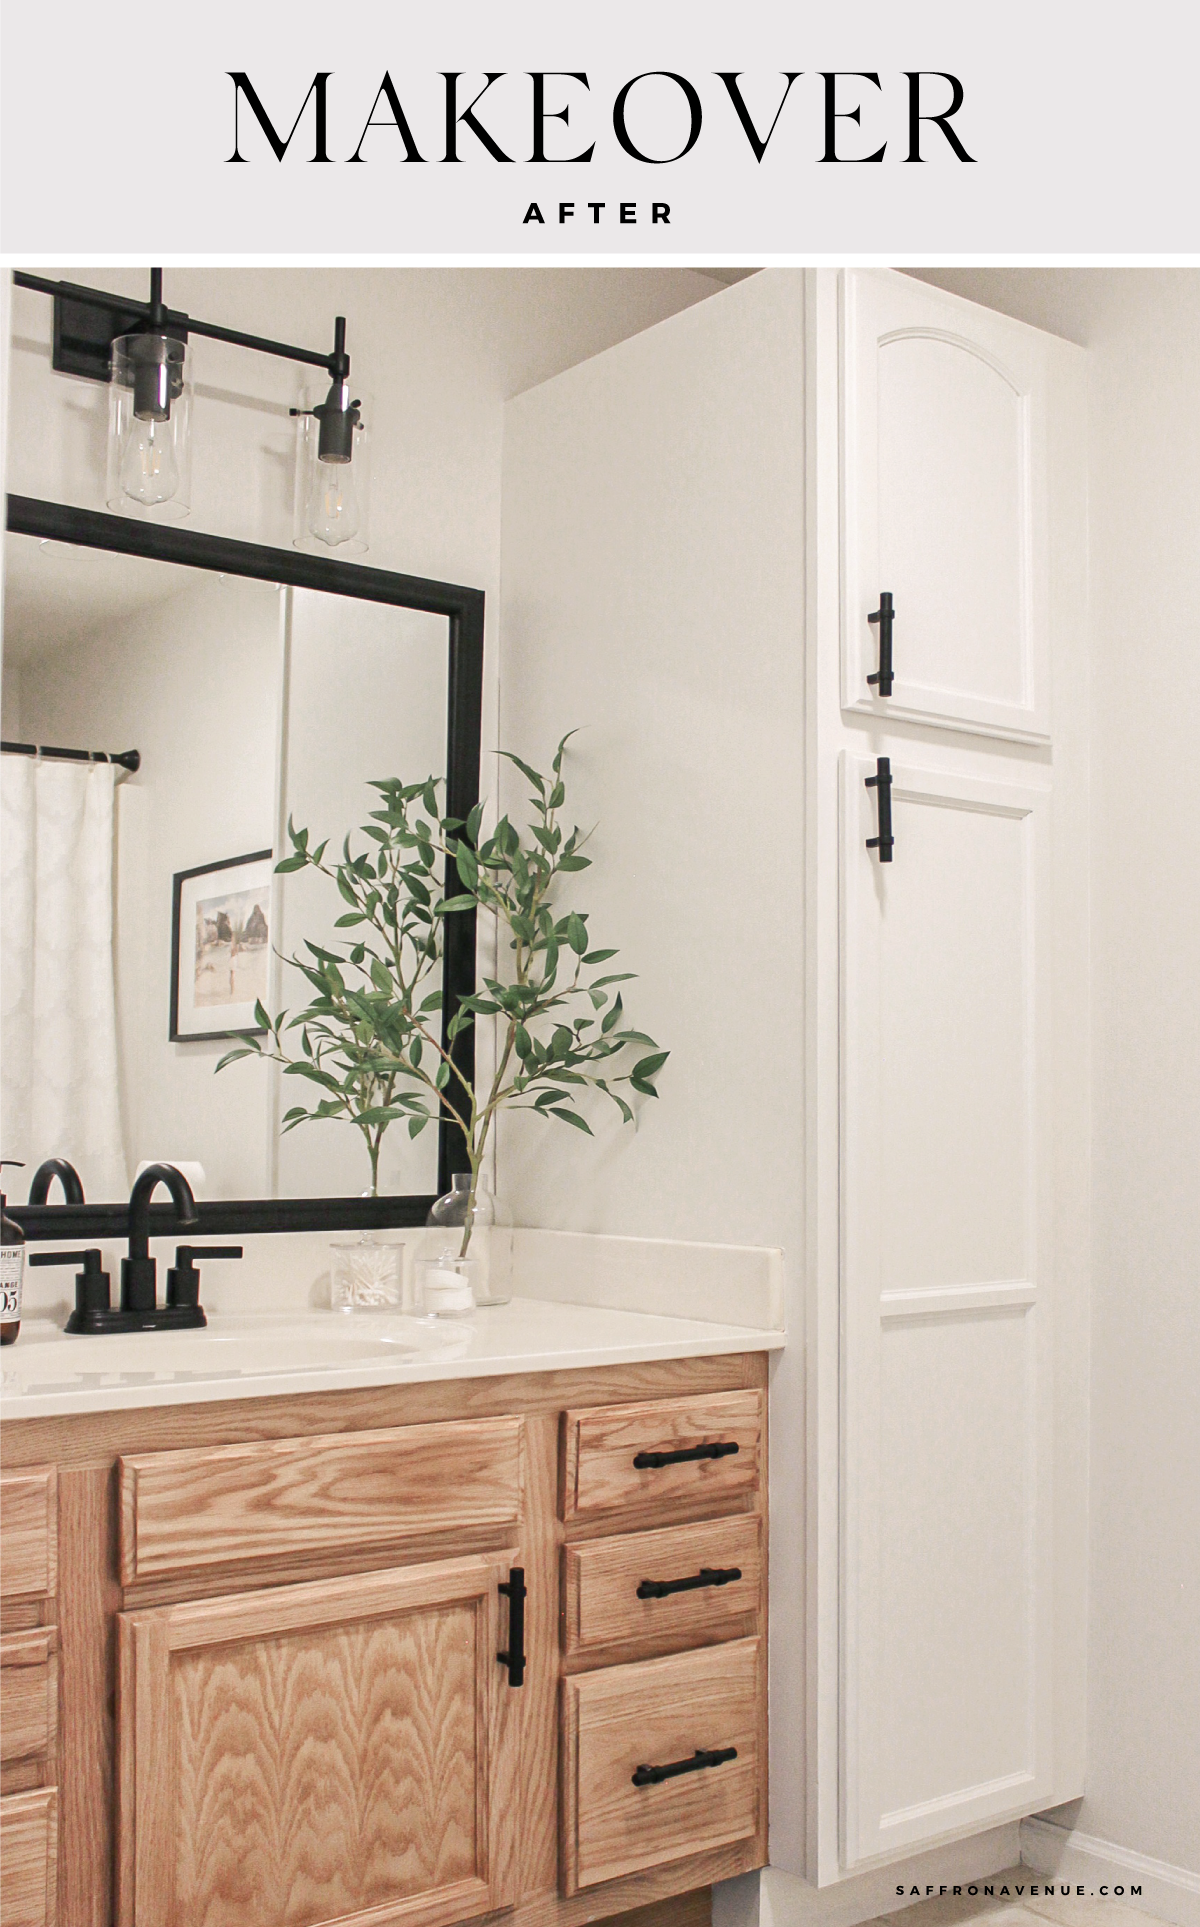
The AFTER
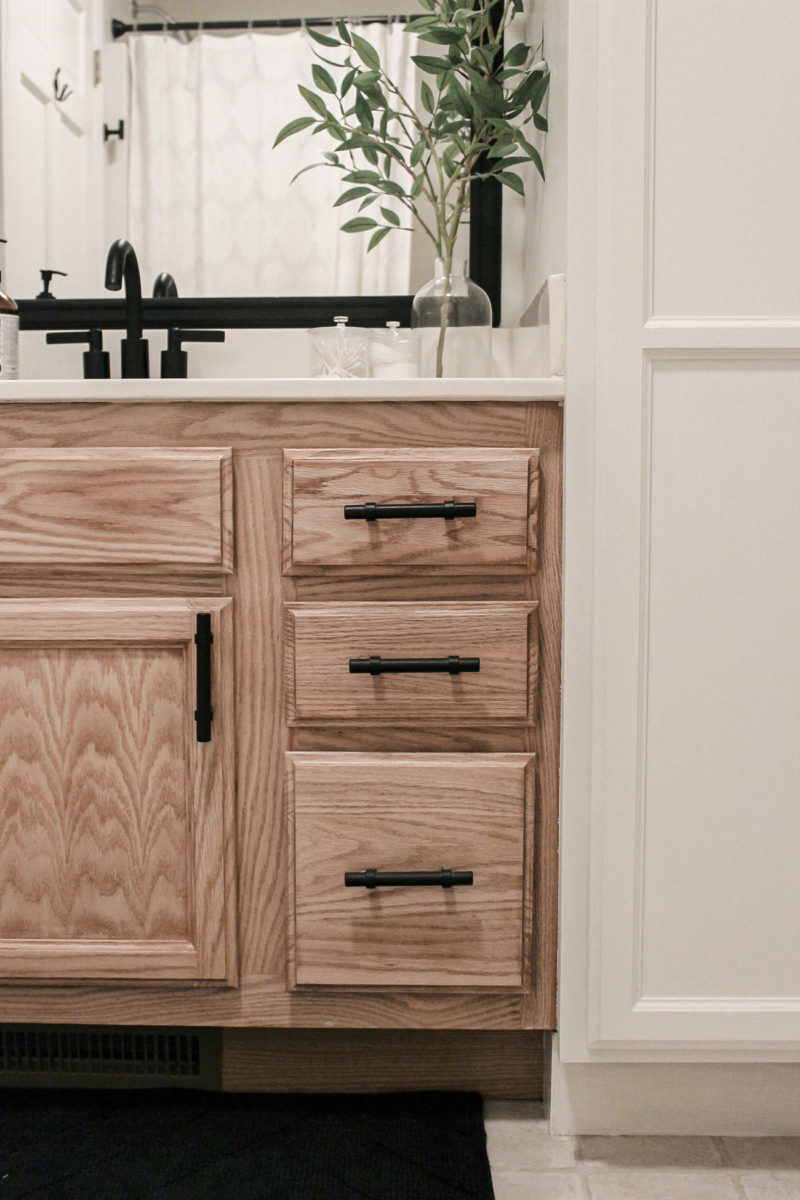
Because I didn’t want to paint all the cabinets (because I despise that), I decided to just try sanding down my base cabinets to make it look more natural and less ‘orange’. Not only that, but I thought by painting the tall cabinet white, it would make it feel more open and clunky.
NOTES
- I’m actually delightfully surprised about the cabinet. I sanded it down and just added 2 coats of matte polyurethane. SO MUCH EASIER.
- I really wanted to try adhesive faux moroccan floor tiles..but, womp womp, they didn’t work.
- I thought about painting aa floor pattern, but I knew we would be selling within the year and didn’t want it to look cheap.
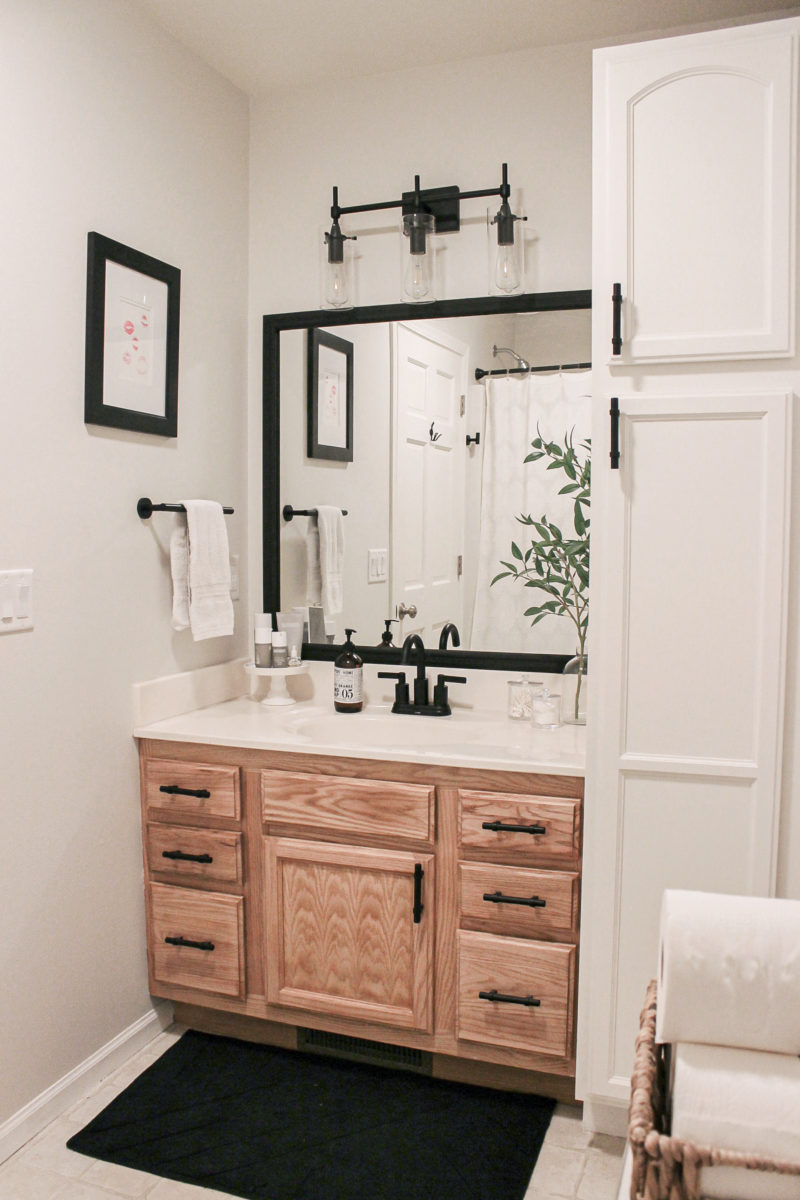
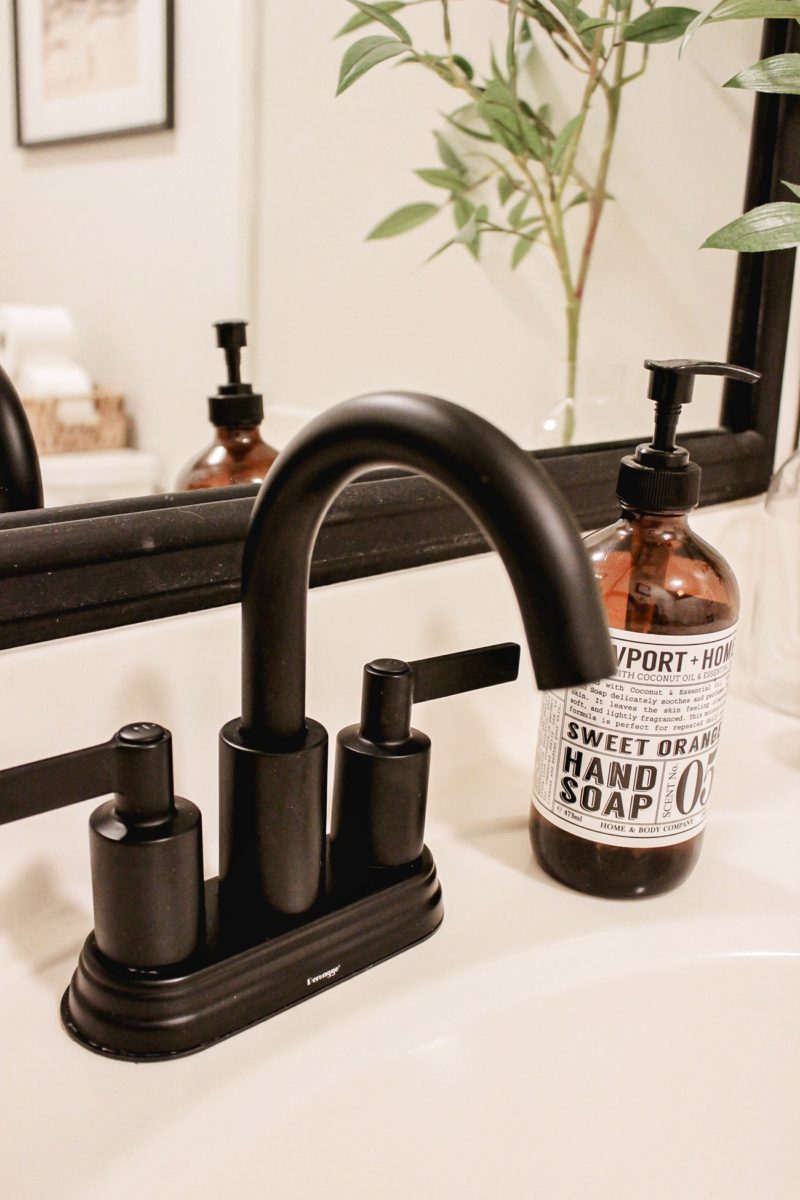
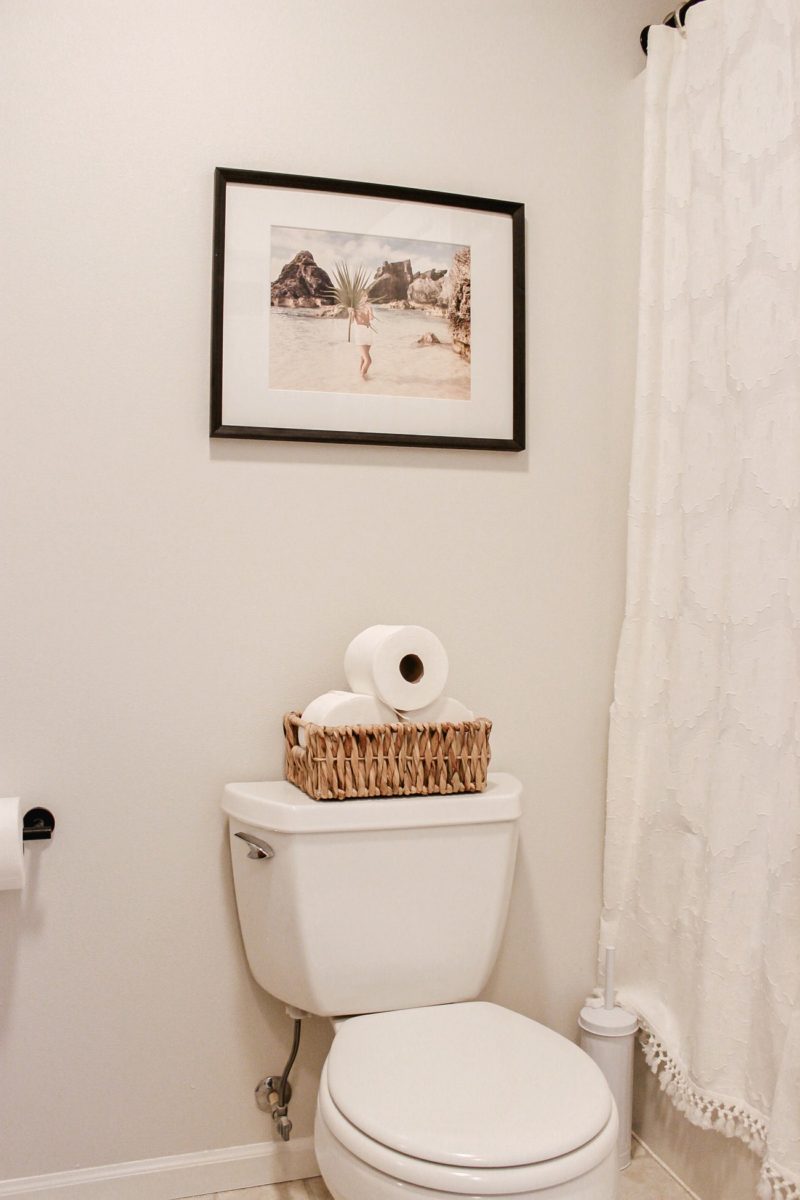
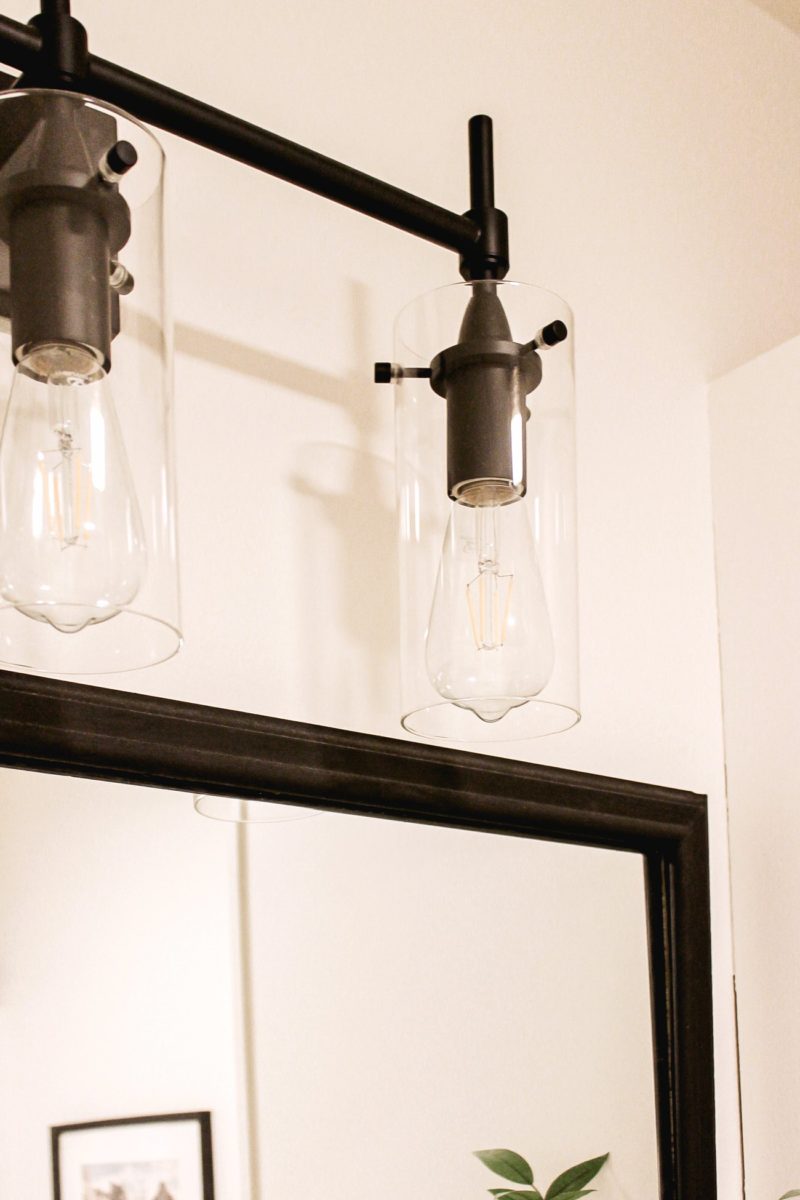
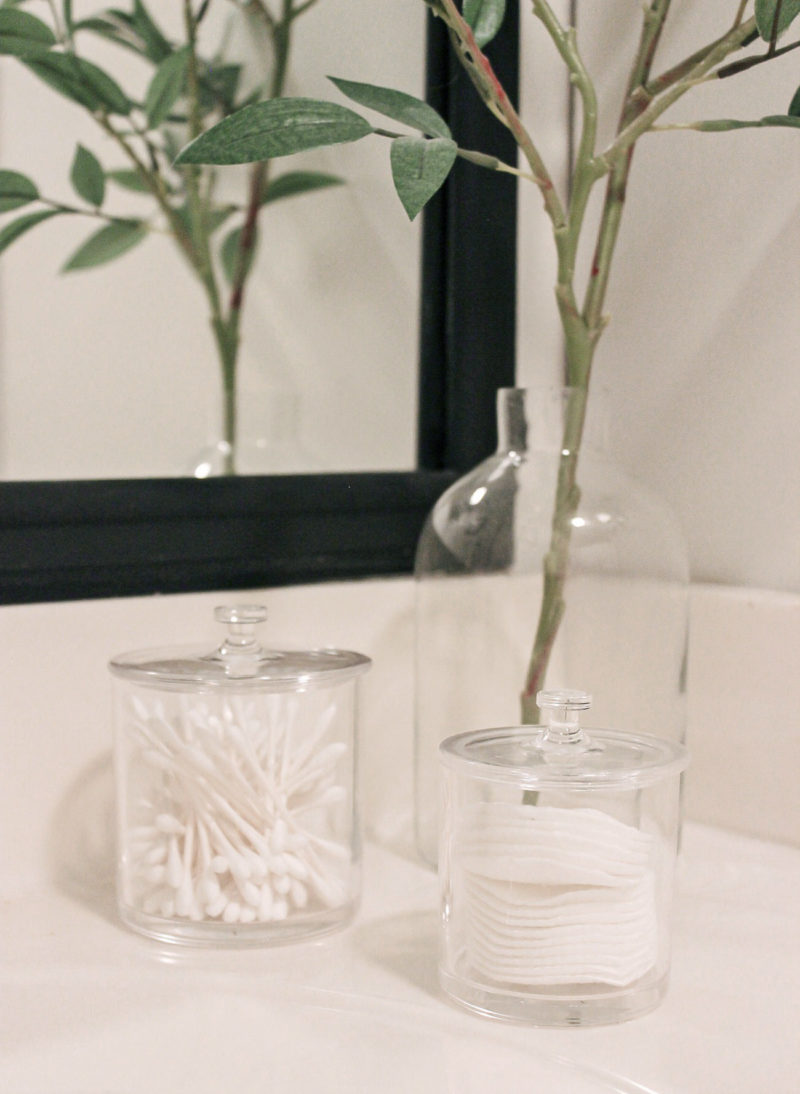

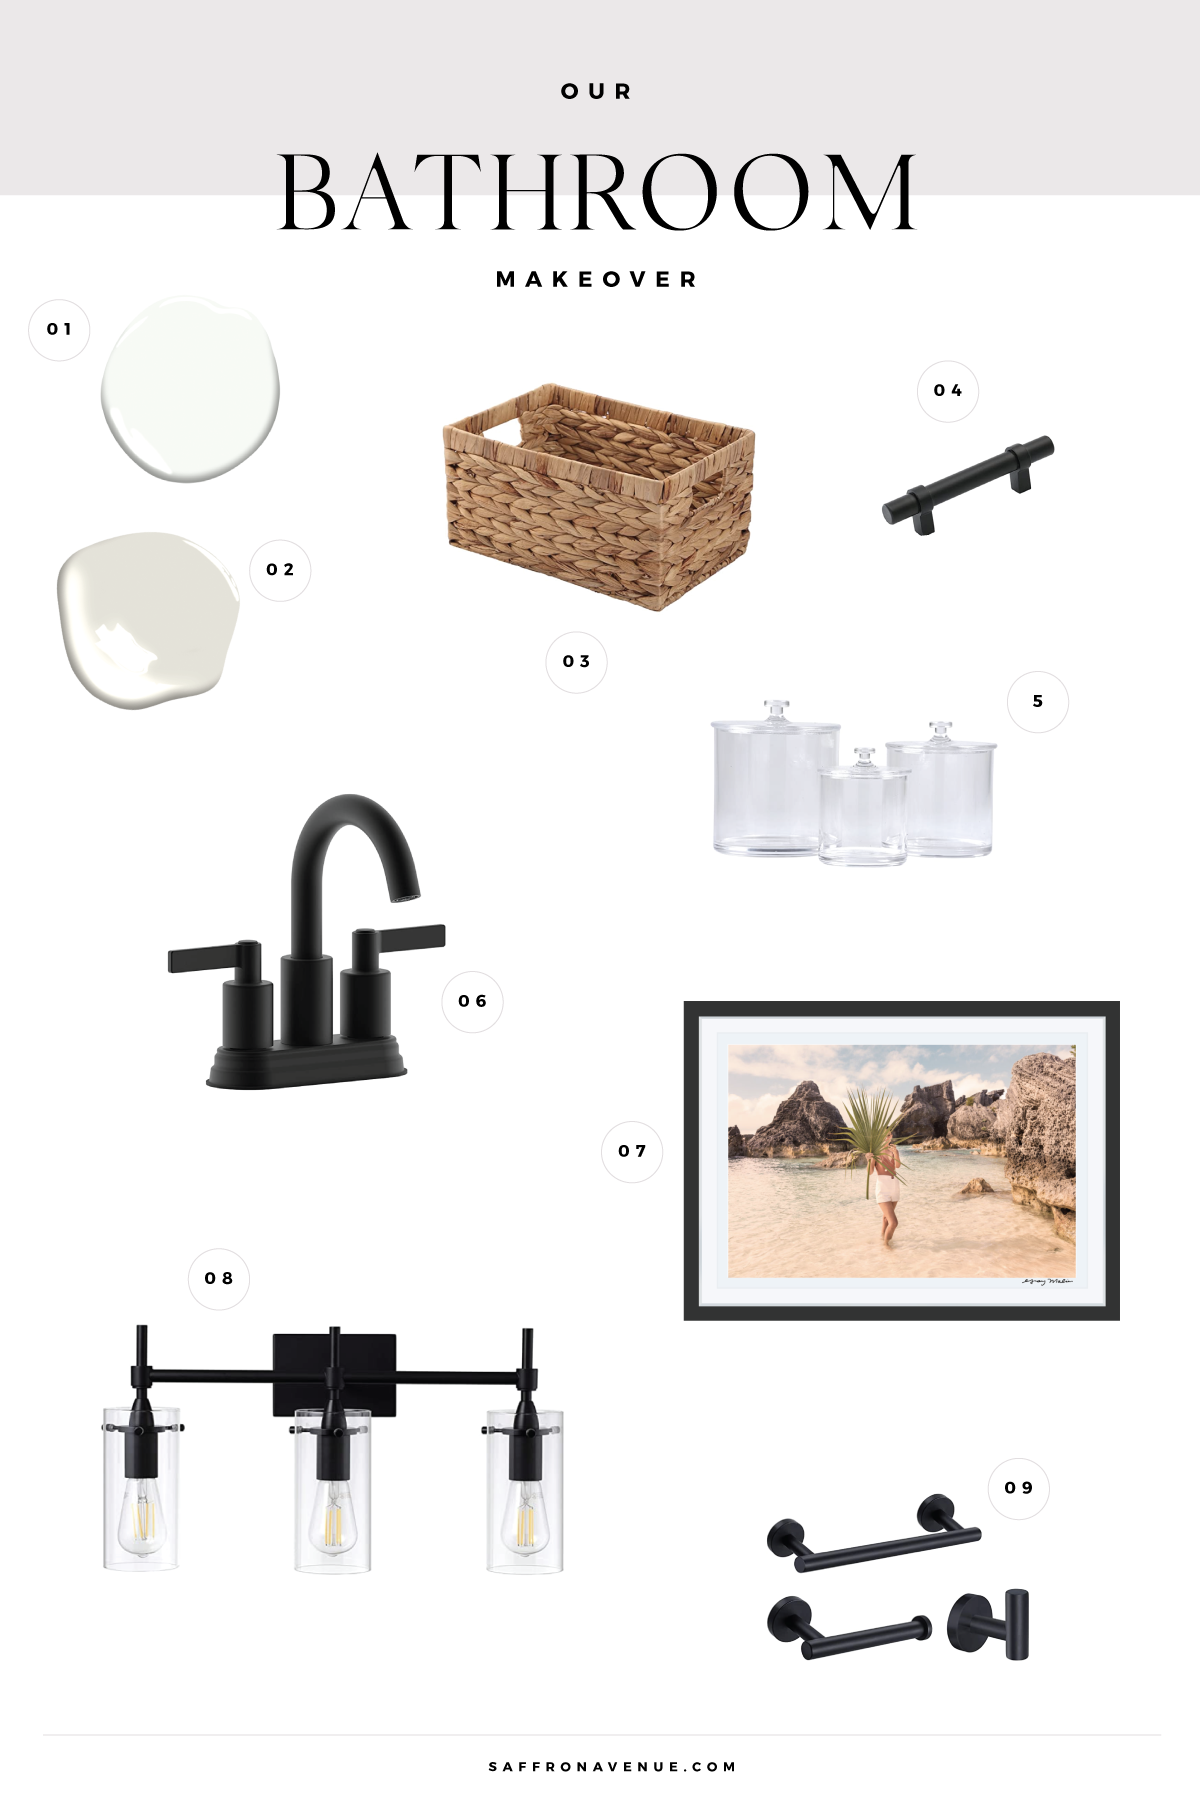
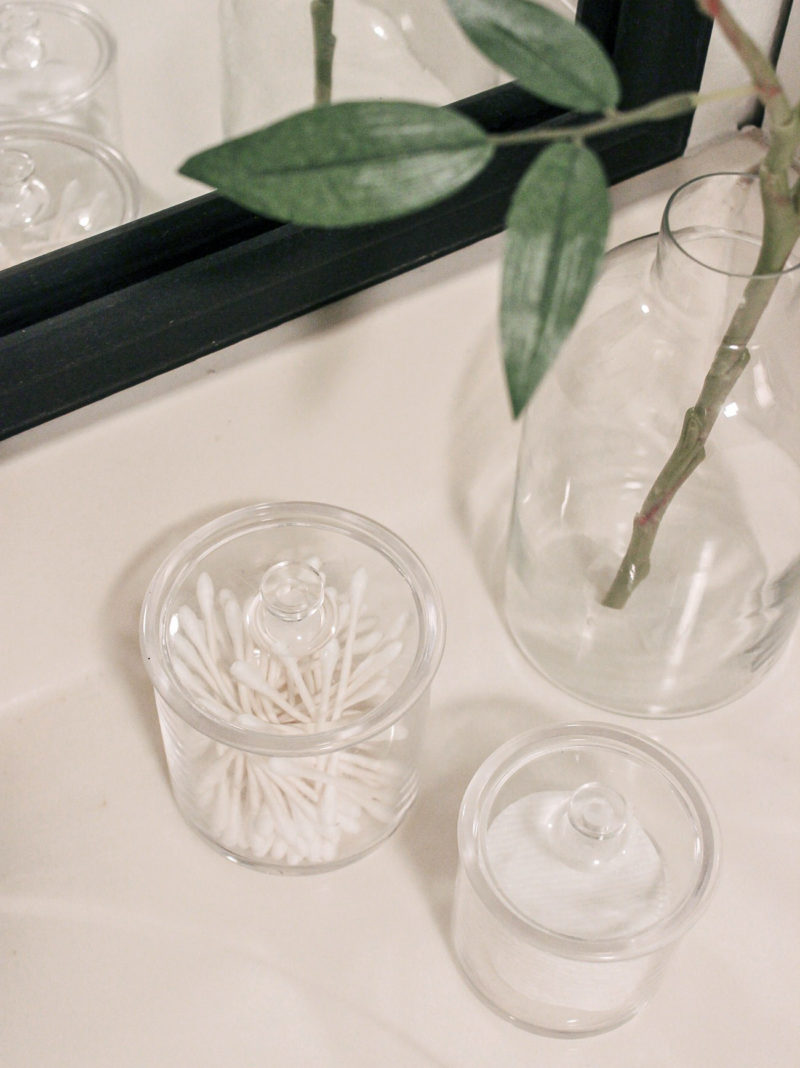
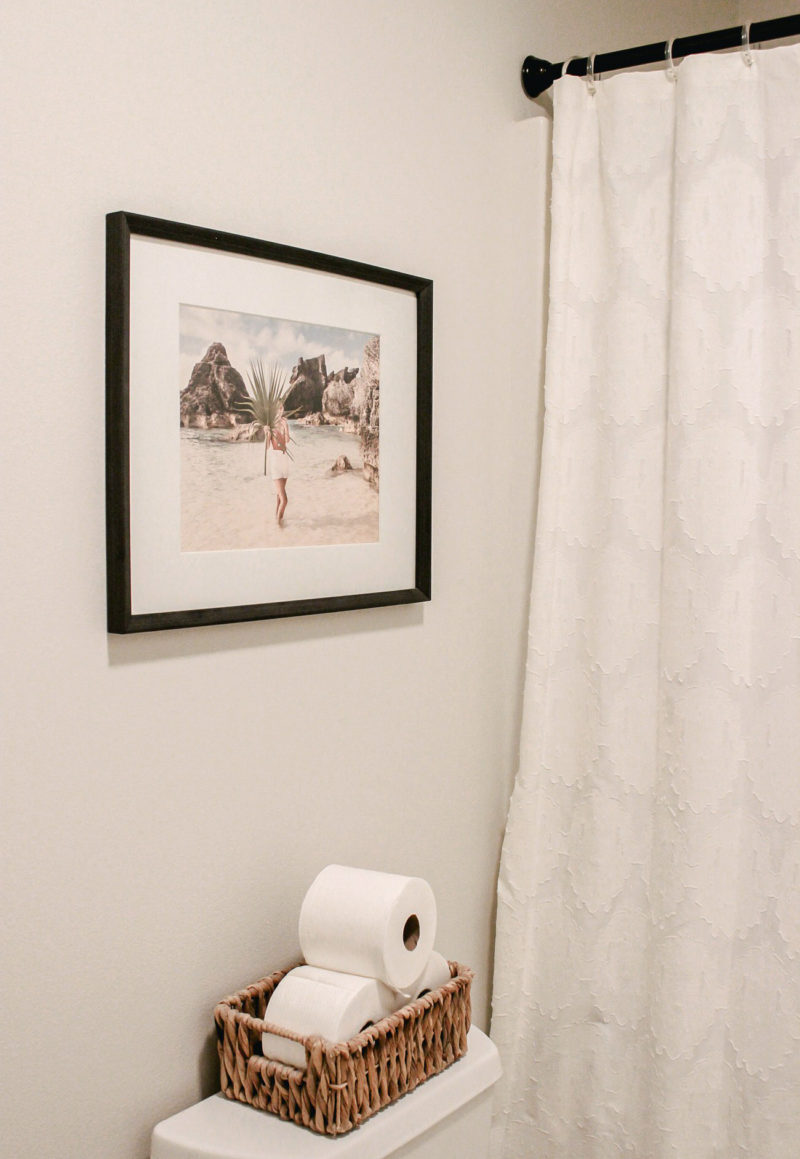
01 :: Trim/Cabinet Color 02 :: Classic Gray Walls 03 :: Basket 04 :: Cabinet Pulls 05 :: Canisters 06 :: Faucet 07 :: Artwork 08 :: Light Fixture 09 :: Hardware
I may receive a tiny commission if you click on my affiliates/products/advertisers links. P.S. The products that I share are the ones I believe in.
If you click on my affiliates/products/advertisers links, I may receive a tiny commission. P.S. the products that I share are the ones I believe in.


Hi,
Love the cabinets! Could you give me some more info for exactly how you got that look?
I just sanded them (to remove the gloss/etc) and put a matte poly as a protectant :) That’s all!
is there a certain color of polyurethane u used. Can u post a picture of which one u used pls.
I think just Minwax Matte Poly? I did this in our old house so I dont have it anymore. But found it at Home Depot!
I have glossy oak cabinets and I’m curious what level of effort and elbow grease it took you to get your finish off ? Yours look great could you give more detail about your sanding process? What grit you used? Did you use an electric sander, etc.?
Thanks!
I cannot remember the grit, but I would say medium grit to start and could always do a fine one after. And yes, highly recommend a palm sander! I did that and then just did the corners by hand. The whole process was sooo much quicker than painting!
Girl, you killed it! I love that you painted they tall cabinet and left the vanity natural wood. It looks amazzzing! 🖤
Where are your vase and stems from? It all looks so good!
Michaels or Hobby Lobby!
Oh I LOVE this post! I desperately want to upgrade my kitchen cabinets without painting. I too would love a step by step post of the process. Your website is stunning.
Of course! 1. Sand (used a palm sander and by hand in corners) 2. Wipe dust off with water 3. Apply 2 Matte Polyurethane Finish Coats! https://www.lowes.com/pd/Minwax-Polycrylic-8-fl-oz-Matte-Water-based-Polyurethane/999918674
Looks great! I did the same with my 90s bathroom cabinet a few months ago. In my case painting would have been easier due to the cabinet shape but I like the natural look. I see you painted the wood trim, did you do that through the house or just the bathroom? I’m struggling with that in my own space.
Yeah, I’ve never tried it and it was so much easier than painting (win-win)! And yes, besides that the taller cabinet is the same white, all of our doors and trim in the house was also White Dove ;)
If you don’t mind me asking… what sheen did you go with the trim?
We do satin on all trim/doors/cabinets and eggshell on walls :)
I love your bathroom – it looks gorgeous! Was also wondering where you got your shower curtain. Love it!
Good ol’ Target!
Hi! This is gorgeous. Where is your olive stem from? Great work!
I believe Michaels or Hobby Lobby (years ago ;)
You did a great job, very inspiring! I have oak & don’t want to paint them & have to worry about it chipping off & looking bad! Did you use a filter on your after picture?
Thanks 😊
Thanks! I had to lighten the photo, simply because there is no natural light and didn’t want the lights above the sink on for pics (too blown out). But, it’s actually pretty spot-on in comparison to real life. If anything the photos gave it a very slight pink hue and more of a contrast with the wood grain..which didn’t seem as noticeable IRL. – These were oak and I thought turned out great, especially considering how much cheaper and easier it was than painting! – BUT, keep in mind that the other reason I couldn’t do the same sanded down look on the tall cabinet is because the side piece (going up to the wall to the right of the sink) was not real wood..so I had no choice but to paint the tall cabinet!
I love this! I noticed you have knobs in originals and drawer pulls in the after photo. How did you fill existing holes with the natural finish?
Good question! I did my best to simply try to match wood filler color. If you went in and looked for it, you’d probably see one or two, but most matched And filled well!
Beautiful! How did you get rid of the hole that the original knob was in??? For the cabinets I mean?
I just found a matching wood filler color :) – if you look close enough on a couple of drawers you can slightly see it, but to the unknown eye, it blends well!
It looks beautiful! How did you do the frame on the mirror?
That was already there when we moved in, I just painted it black :)
What did you do for painting the white cabinet? Did you do anything to remove/hide the oak grain?
Hi there, I pretty much did the same steps as this for the front and doors (since the side was just printed wood and cannot be sanded, just primed/painted). https://saffronavenue.com/blog/our-first-home/painting-kitchen-cabinets-our-process/. — If your cabinets are super ‘knotty’ you actually might need to add an extra step to cover them (with spackle or something).
What was the cost estimate for this project? Would like to do the same for my guest bathroom
This is FANTASTIC! I’m curious if you think it would work on a vanity with an espresso finish. Can I sand that off too?
Great work!
Hi there, You could try, just test is on the back of a door. Also, keep in mind that if you have any ‘particle’ board sides, you cannot sand that down. That is why I had to paint the tall cabinet (that tall side is not real wood but printed).
Hello, did you sand in between coats of the poly?
I did not ;)
I love this. We’re moving into a home soon that we want to update but not drop huge cash on for professional renos. This is the exact style I’m hoping for, and I’m ecstatic it’s going to be in our realm of possibility!! 😂 Thank you for sharing all of this info!
Aww, that is so exciting! Have fun with the process..you’ll be surprised how much paint can make a difference! We really didn’t spend much on this house ‘makeover’ besides paint!
I have the exact same vanity and long cabinet and it’s an amazing idea to keep them different yet complimenting. Love it !! Can’t wait to try the same. How long did you wait after wiping the dust with a wet cloth and applying the poly ?
Hi there,
I did it right away!
Love the look it’s very clean a gives it a warm look at the same time! I would like to attempt something similar however I have a side panel on my vanity cabinet (like your tall cabinet) any suggestions to still achieve a similar look? Also what about if your countertop is not so white anymore? Thanks for the inspiration!!
Hi there! Are you doing the same thing with painting some white and some just sanded? I think your best bet might actually to know which type of wood you have and maybe buy a matching veneer or a thin sheet of wood at the hardware store to apply to the side. And our countertop didn’t look as white (next to the white cabinet)..but I left it. I thought about painting with countertop paint (which I’ve heard good things about). But didn’t care quite enough because we were going to sell soon ;)
Curious to know how your project turned out because I have the same issue with the side panel!
We have a similar bathroom design and love your redo. What did you do for the tub area? I was thinking of adding tile there?
We didn’t do anything to the tub area..but tile would be beautiful!
This looks absolutely amazing!! Gives me a great idea for my kitchen cabinets!! Thank you for sharing!!
So glad I saw this post. I’m currently in the process of redoing my bathroom (THE DIY WAY). I wanted a farmhouse or rustic look. I have the exact same vanity as yours but without the left drawers. I wanted to go for a darker color and of course when I was looking at Lowe’s for stains I was immediately told to try paint. (Which I personally don’t like the look of). Then I realized I had a can of minwax gel stain. So I started to sand a small area inside the door and actually loved the bare wood. But I stained the part of the door I sanded and the grain definitely came through. Plus I was sanding with my bare hands (not recommended). It’s a very lengthy process because you have to wait 24 hours before you can apply another coat.
Now that I’ve seen your cabinet which looks absolutely beautiful I have decided to just sand it and use the polyurethane and be done! Furthermore I have to save my energy to remove my wallpaper. But might just shiplap the walls.
Thanks again. Beautiful job!
I love a good DIY project, but don’t we always end up having to try a few things before we find what works?! ha! It sounds like yours is going to be beautiful and hope you love the outcome!!
What grit sand paper did you use? I see that you want to sand off the finish but not sand down too far into the wood.
Great question..whatever we had left in the garage :) – But, I would say I believe I started with a lower grit on the palm sander and then a fine/high grit to finish (smooth).
What color are the walls? Love the design!
Benjamin Moore, Classic Gray!
The polycrylic you suggested is making my wood look darker. Do you have any tips on how you kept your wood so light. Thanks!
Hmm, I wonder if it’s the type of wood?. After sanding it and silly the clear poly it did slightly ‘darken’ (well, look more wet than the dusty sanding), but still was lighter and much more neutral than the orange before! If you are testing on the inside, do you think adding a tiny bit of white to the poly could work? I’ve mixed stains with white to lighten, so it could be worth trying on a small section on the inside?
Love it all so much!!, that my bathroom remodel was inspired by your remodel. We are sanding the vanity this weekend. Hope it all goes well. I’ve located similar hardware, but wanted to know what is the width of your mirror frame? My mirror currently doesn’t have a frame and so I am on the hunt for one.
Margarita, how did your vanity come out? I’m curious about doing this to our outdated/honey oak cabinets, and I want to know others’ experience trying this technique.
Love it!! Gorgeous combination! Getting ready to do a similar makeover. May I ask why the faux floor tiles did not work?
Hi ,
Love the idea of sanding and not painting . I tried to sand my oak cabinets, but they are not getting evenly sanded for some reason. I tried manual & then electric sander but its still uneven . Any idea why it would happen that way ? Or what I can do?
Just seeing this, sorry! Mine was actually an older palm sander ($5 garage sale find) and seemed to work fine. BUT, I had a pretty fine grit!
Thanks. Let me try the fine grit :)
I’m not the original poster, but I asked that same question of another DIYer that had sanded her oak vanity. She said the secret was to use a new electric sander. She said for some reason the older ones tend to leave marks. Hope that helps!
That’s so interesting! Mine is older, but luckily didn’t see any marks. But, I also used a pretty fine grit if I recall :))
Let me try the fine grit :) Thankyou for your reply .
Hi there! I just started this today after finding your post, so thank you! I was wondering if your cabinets were that light before putting the polycrylic on or was it the polycrylic coating that made them that light? I have the same color of cabinets and have just sanded them down, but they aren’t as light as yours! I’m wondering if I need to sand more, or if the top coat will make them appear lighter.
Thank you!
Hi there, They were kind of light (orange-ish oak circa 2005), when I sanded it down, without poly on yet, it was lighter than what you see in the pic. Adding the matte poly darkened it just a tad. But overall, the type of wood we had did lighten and desaturate that orange color. P.S. it might be worth testing on the inside of a door or drawer some wood bleaching agent!
Wow, this transformations are really amazing. I am really glad to see that I would surely do it for myself as well.
I love the look of this! My entire house that we just bought is all this color/kind of wood design!(2005 built) Definitely going to give this a go! Question though— I have a side panel on mine- I don’t believe I can sand that. What would you recommend? Thanks 😊
Hi there, mine was the same and that is why I had to paint it all white! But, I was tempted to just get a veneer style piece of wood (or a thin piece from Home Depot) to try and get the same look. But, I decided to just paint white instead since it opened up the space more.
Thank you! I don’t have the long cabinets like yours otherwise I would probably paint that all white! I just love the look of the wood sanded down.. do you think I would have to find a stain similar in color? And then sand it?
Ooooo! I think if you possibly find the same type of wood used on your cabinets you can get it close (after sanding the cabinet down, removing the poly and stain). It might worth finding a scrap piece from the store and comparing it to the inside of a sanded down cabinet door
Wow, what a transformation! I love the sanded effect, plus you save money and time by not having to paint the cabinets! I got my kitchen cabinets refinished a few weeks ago and ever since I’ve wanted to update my bathroom cabinets. I think I’m going to try your process out on my downstair bathroom vanity this weekend, and I’m crossing my fingers that it turns out as good as yours!
How hard was it to change the sink faucet? I have the same chrome one you did in the before picture and I am looking to change it to black like your if it wasn’t too crazy to do. Love what you did to your space! Thanks for the inspiration!
Hi there, my brother did it for me in about 20 minutes and he showed me the steps, so although I didn’t do it myself, it wasn’t too difficult looking!
What color white and what type of paint did you use for the tall cabinet?
China White by Benjamin moore!
Hi! Love how you did this, was just looking on a tutorial for how you did the cabinet / what Stain or color you used? I love the lighter shade and want to do this to my bathroom
Hi hi, No stain, just did a matte poly after sanding!
Beautiful. What kind of Matte Polyurethane did you use?
I always use Minwax ;)