One thing I’ve been trying to focus on with my new website clients (and recommend for anyone purchasing my new Templates) is making sure they understand how to use their site and their blog, but also how to optimize website images and use SEO to better their site. So, today I thought I would break down a quick tutorial on ways to easily compress and optimize images for SEO and how to properly name them prior to uploading. P.S. I use a couple different apps/plugins, just know that some of this can also be done in Lightroom (I’ve just gotten used to this way).
Naming Your Image Files
If you received images from a photographer or simply took some from your phone, you definitely can’t just pop them onto your site…well, you could. But no one will recommend that ;)
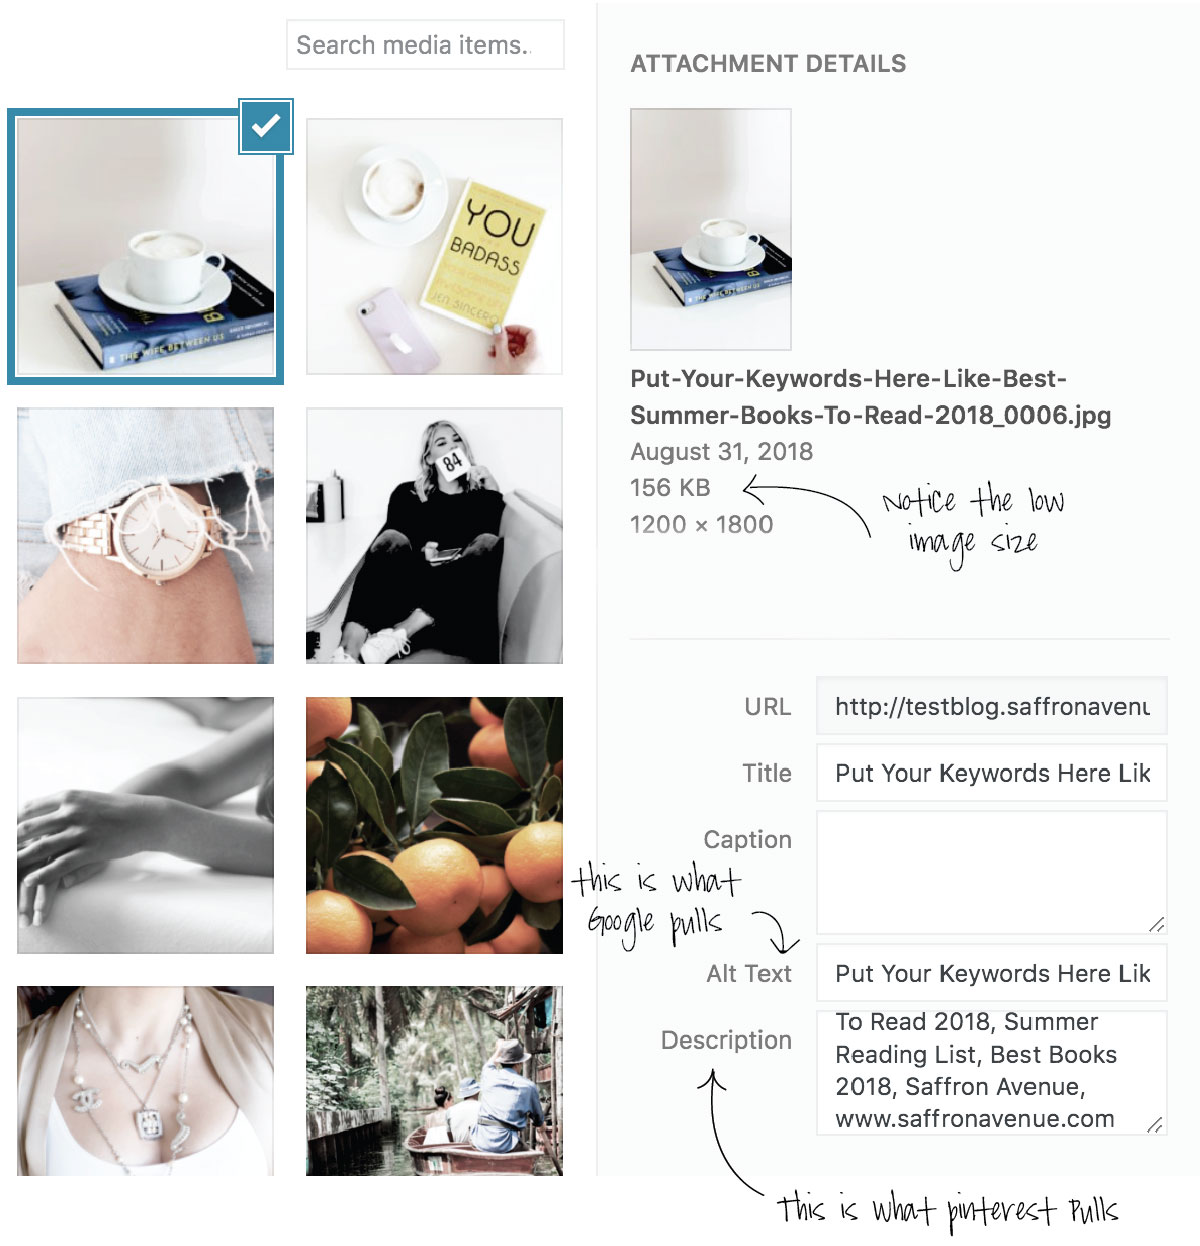
You want to properly name your images to help explain that photo. This is what Google picks up on search and is what really makes a difference, especially when it comes to YOUR ALT TEXT. You’ll see the image title and the size of each..and it will make a difference, especially when someone is searching online or Pinterest for books to read this summer, they probably won’t find it under DSC_12627.jpg ;)
BAD : DSC_12627.jpg (2 MB)
BETTER : Books-To-Read.jpg (981 KB)
BEST : Best-Books-To-Read-This-Summer.jpg (184 KB)
WHAT I USE FOR NAMING Image Files
I bought a license for BlogStomp and actually like it quite a bit. It has the option to make your own ‘styles’ and also ‘freestyle’ your images. So, if you drop in 30 images from a photoshoot, you can use the freestyle to easily arrange and put images side-by-side prior to exporting. (This saves me so much time).
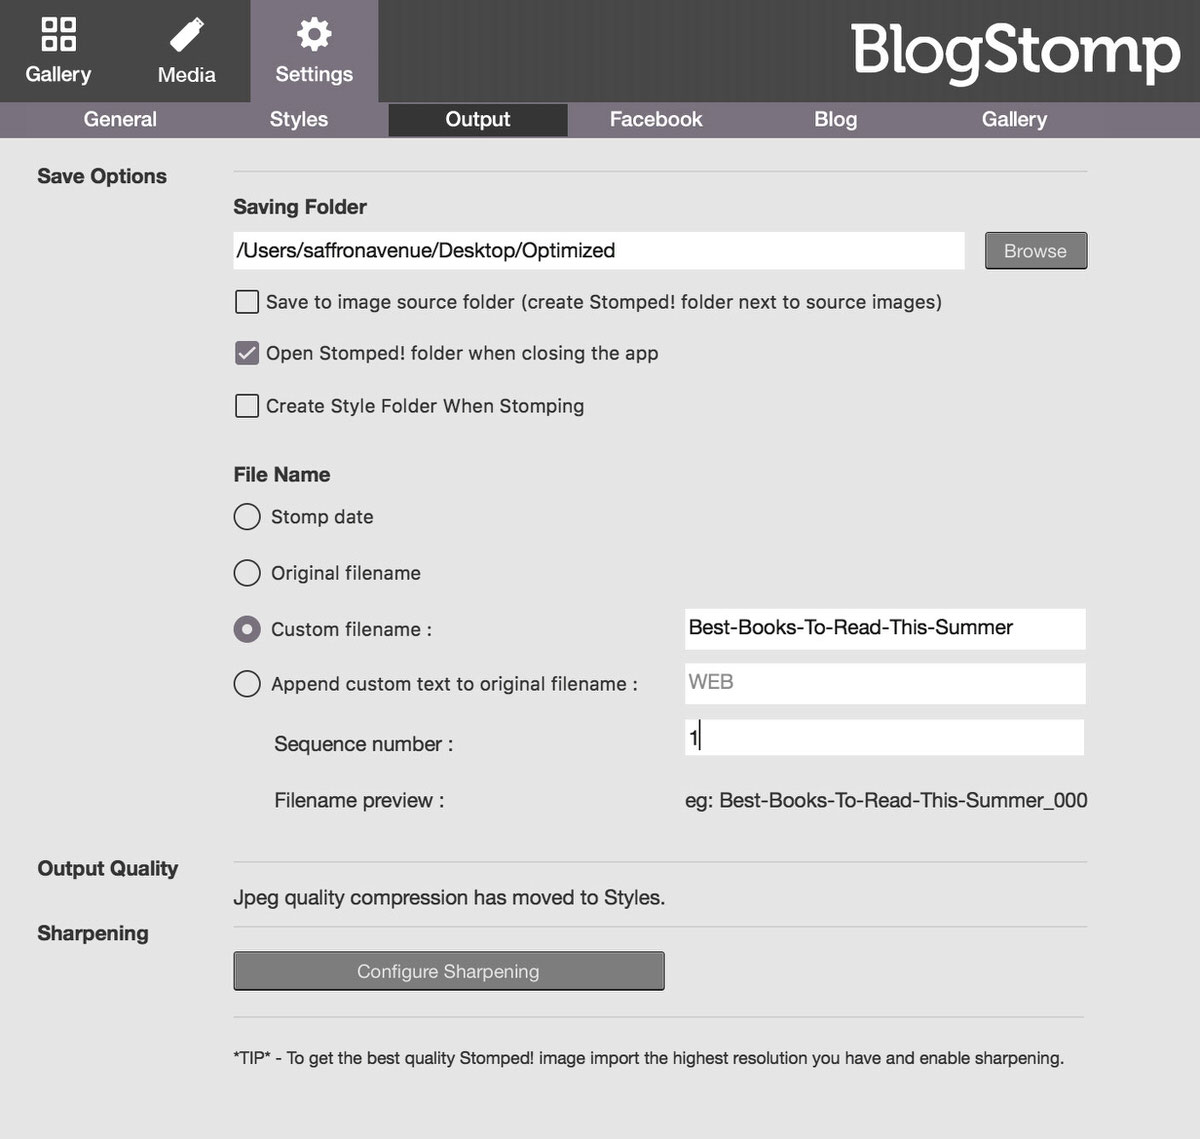
MY SETTINGS
1. STYLE: I created a Style and have the max width set to 1,600px, I have a margin of 10px (for those side-by-side images), and can even add my logo watermark.
2. OUTPUT: This is the important part. Make sure you properly name your images with a CUSTOM FILENAME! I always to try to use keywords and words/phrases that I think would be searching. Some examples:
Best-Books-To-Read-This-Summer.jpg
Top-5-Scariest-Thrillers-To-Watch-This-Halloween.jpg
Cutest-Coffee-Shops-Madison-Wisconsin.jpg
3. BATCH: Once you ‘Save’ your output options you can go back and Freestyle or Batch your photos all at once. Just hit ‘STOMP IT’ and it will create a new folder.
4. NOTE: Blogstomp does have a ‘Space Saver’ style setting, which does compress, but not that much. So, I’ve found a better one below.
How to Compress and Optimize Images for SEO
Okay, so that first part is done, I’ve arranged my images, re-sized to my liking, creating the file name, and exported it into a folder…but the images are still LARGE. Friends, this is important.
You can’t go and upload 20 different 5,000px images that are 2MB..it will slow your site down, take longer to load, and in turn lose potential visitors.
So, I use a quick and easy little Image Optimizer app called JPEGmini that helps compress files. I put the settings to 1,200px for my blog and simply save them into the Stomped folder as ‘optimized’. You want to try and keep you images around 200kb and this tools will do that for you! – I did a full Video Tutorial Below too!
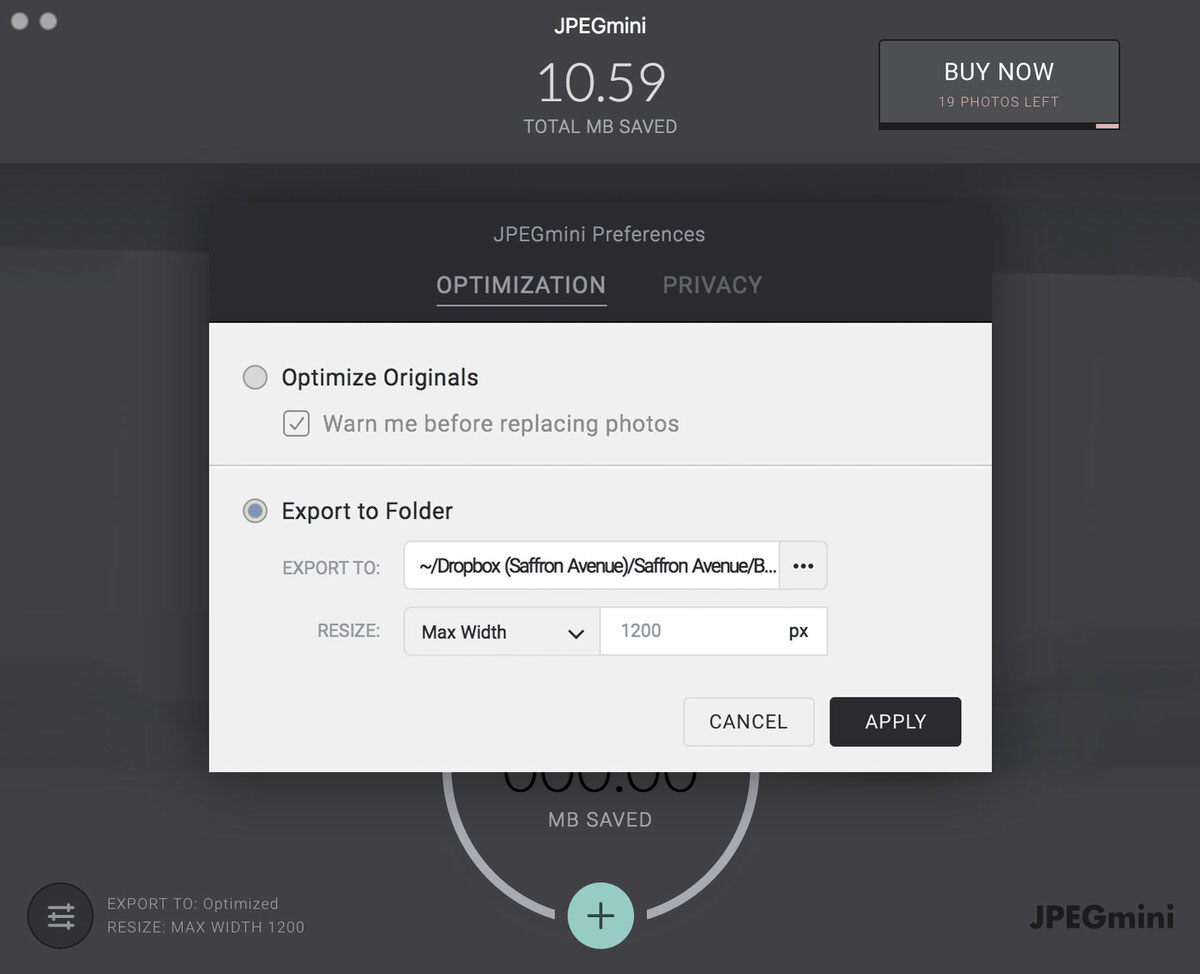
Watch a full tutorial on how to optimize!
—
How to Auto-Generate Alt Text for Images in WordPress
Now that you’ve named and compressed the images, it’s time to add to your blog. But guess what, even though you have a file name and title set, that doesn’t automatically set the Alt Text to your image..well mine doesn’t anyway.
So, I use a plugin called Auto Image Attributes From Filename With Bulk Updater. And have my settings checked below. P.S. You can leave the ‘Remove Hyphen From Files Names’ un-checked too. But do recommend leaving the underscore checked.
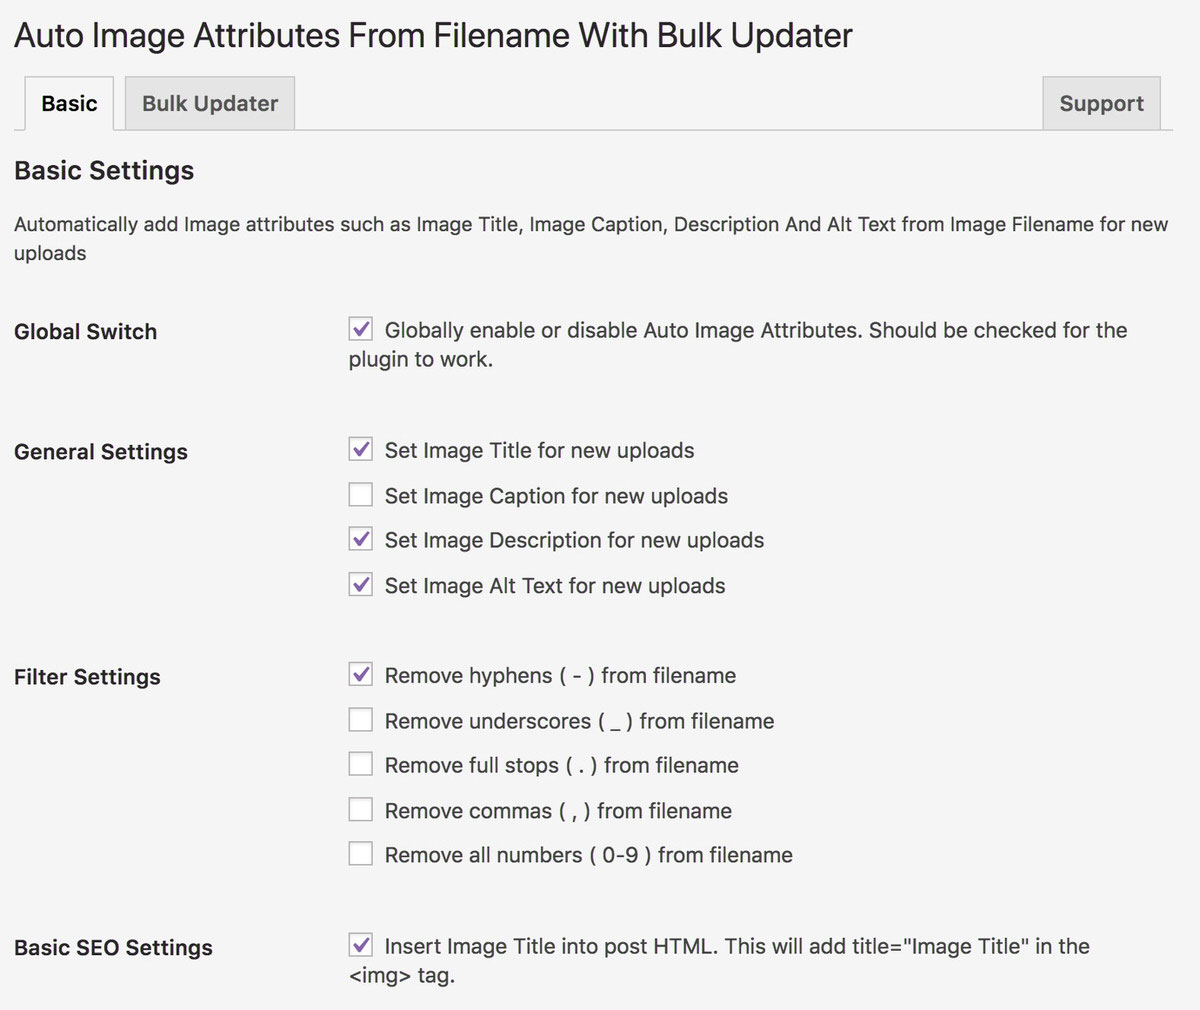
Editing Image Details in WordPress
You’ll see when you drop and upload images into a blog post on the side of each image is the ‘Attachment Details’ – Without the plugin you will just have a Title. But with the plugin you will have the Alt Text and the Description auto-generated P.S. If you want to dive deeper you can even edit the ‘DESCRIPTION’ for each image. You will have to copy/paste into each one. But this is what Pinterest Picks up when pinning from your blog.
Editing Image Details in Showit
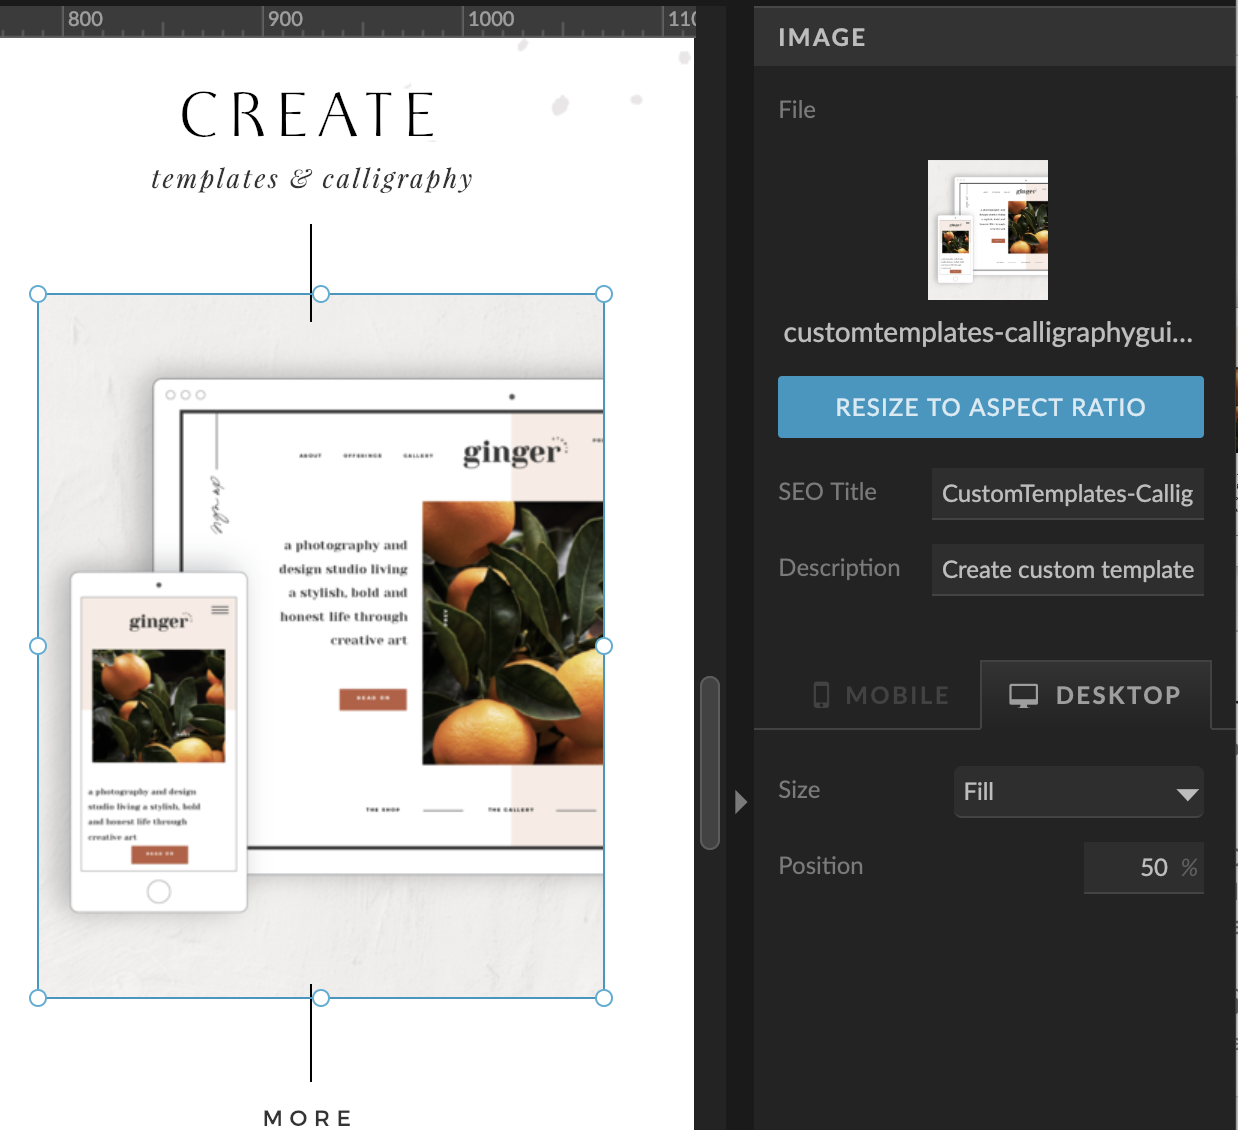
Since you already named the images from the above steps you’ll want to just clean up the SEO Title in showit and then add a more detailed description. All you have to do is click on the image (once added to your page) and on the top right you’ll see the Image tab/section and below will be the info!
I hope that was a little helpful! I just know that every time I go to a site that takes forever to load images..I lose my patience quick and typically won’t go past the 1st page. Not only that, but by naming the images with great keywords will truly help you out in terms of google and searching. P.S. See how to use SEO on WordPress in Showit HERE to put it all into action!


Angela, Thank you so much for your knowledgable posts on your blog. It really helps break down the overwhelming list of things to do and help chip away at them one at a time. You’re a inspiration & I just adore all your beautiful projects. Thank you from one small business owner to another.
Thank you, this makes my day! I always hope these little posts are super helpful!!
Oh my gosh this is GOLD!!!! Thanks so much Angela, for sharing this and saving me a tonne of research!! You blessing! :o)
[…] tips + tools« How to Easily Compress and Optimize Images for SEO […]