
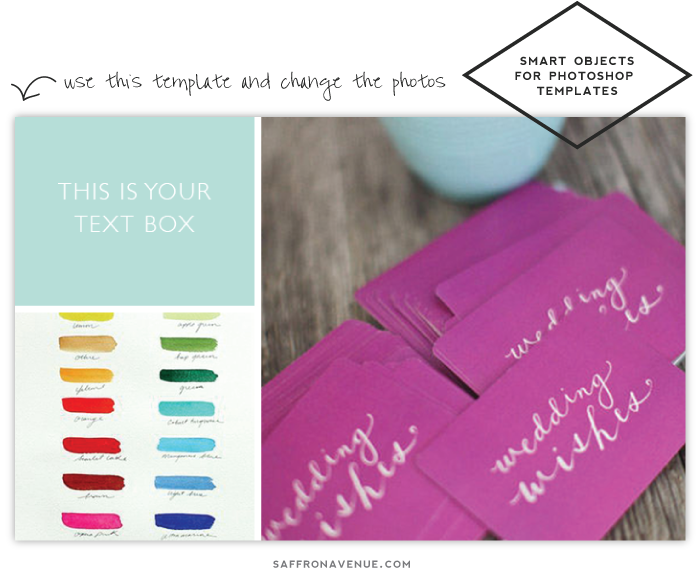
{photos I used: watercolor + calligraphy}
So, today I thought I would do a tutorial for you..it may not be a great tutorial but I felt like I should try. I have a lot of clients who purchase templates from me for their website (blog posts, slider templates, etc), so they can keep the same look and just update the content. So, what I do for them is create a photoshop template with smart objects. I took a screen video of me creating a file and swapping around photos to show you exactly how to do it..and hopefully the video will work :). I also am giving you a template to practice on, it is a .psd for CS5. You can download the template here!
To start off:
1. Open the file and check out the ‘layers’ panel on the right side. You will see I will create a couple of boxes for you. Free Template Here
2. Once I created a smart object (by choosing the appropriate layer and going to ‘Layer — Smart Objects — Convert to smart object’) to change the photos just go the the layers panel on the right sidebar and double click on the thumbnail. That will open up a new tab/window and give you the option to work within that smart object box.
3. Once you place a photo, add text, etc. save that file and close it out.
4. After you save you will see it updated the original file with the contents you placed. Feel free to do it to all the boxes.
5. Just save for web and you are good to go. GOOD LUCK!
{I am crazy new at tutorials, so please do not judge, let me know if it is way too confusing and I can definitely try to fix it!}


I’m super excited you are doing tutorials! Thank you, thank you, thank you!
You welcome..hopefully the more I do it, the better I get at it!!
Yipeeee! A useful & well done Photoship tutorial!!
Thanks for the tutorial! I would actually LOVE to see how you create most of your image collages? Do you use Illustrator? if so thats would be a great tutorial!
P.s I love your site, I’m in the process of creating my own business and blog and all your tips and posts are so inspirational!
http://www.stephypenny.com
-Stephanie
Hi Stephanie,
Thank you so much, I am glad it has helped you! Yes, I do use illustrator for most of my design with the exception of some templates. When I do that I just set up the boxes how I want them and just clipping mask it to put the photos inside.
Wishing you the best!
Thanks for the useful tip! Didn’t know about Smart Objects before this!
Yes, smart objects are amazing to use!
Hi Angela!
Do you narrate this tutorial? I can’t seem to find any sound! I can just follow your written directions if not :)
Thanks for doing these!
Sarah
Hi there,
Unfortunately I do not..I didn’t know how to do both until later on. Sorry!!