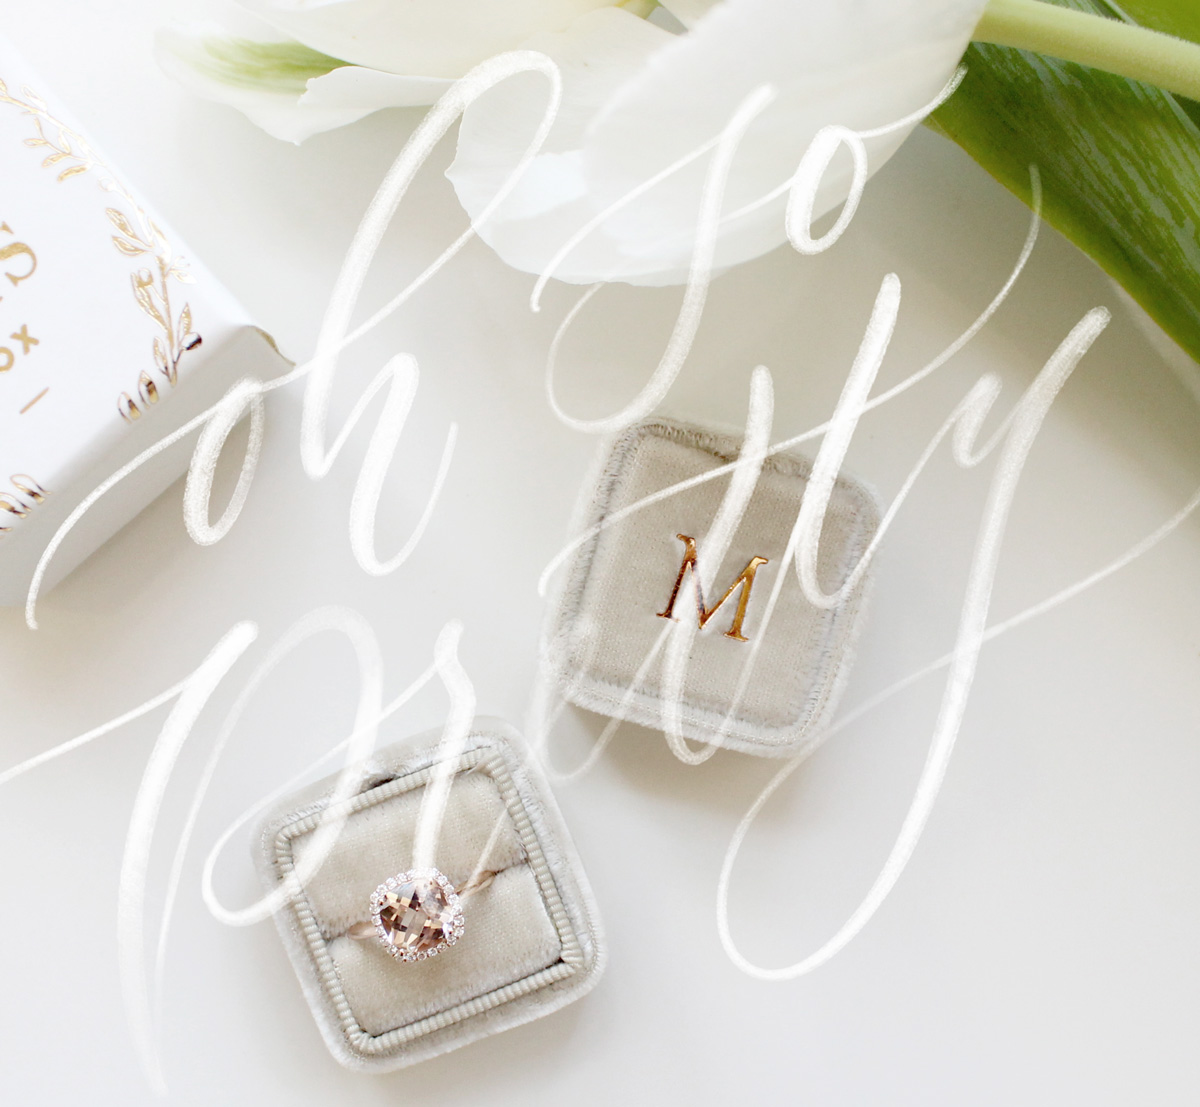
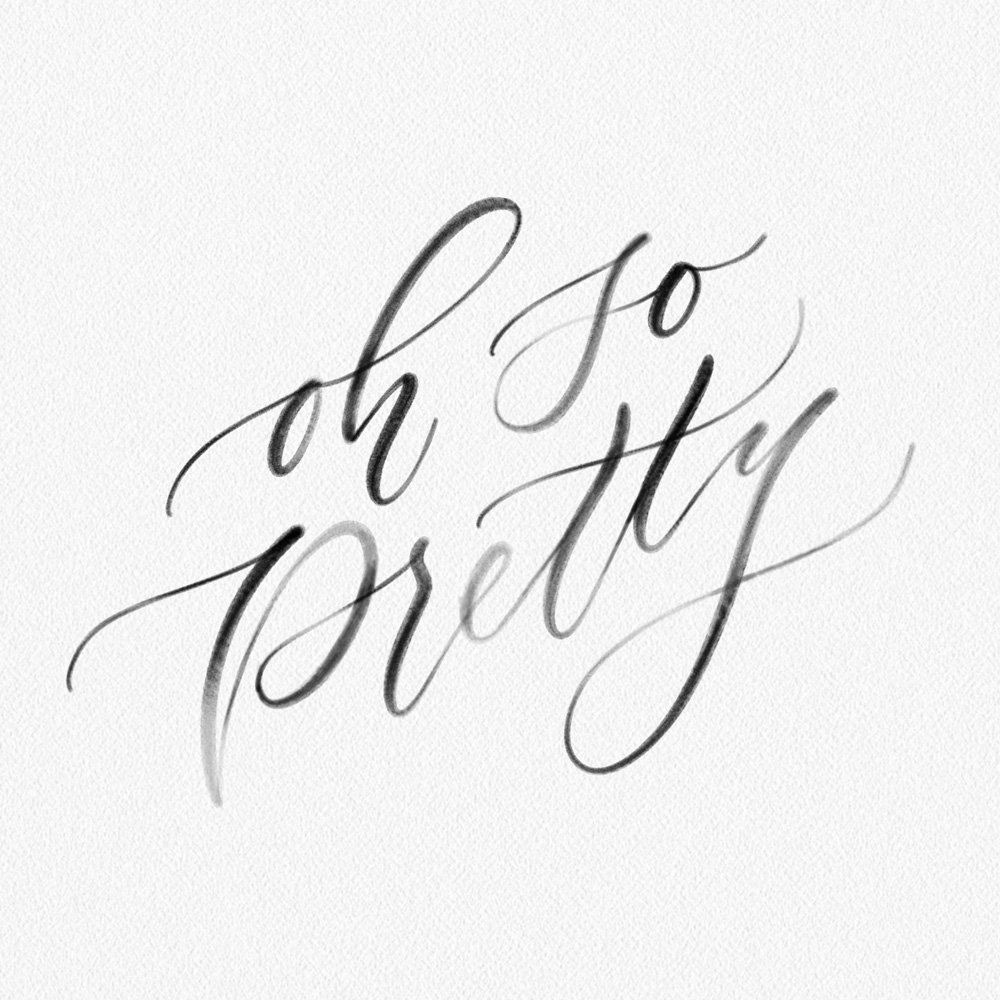
Hi friends, so I thought I would pop in and share a quick and easy tutorial on how to turn digital calligraphy into a photoshop brush. I use this often with logos and quotes just in case I want to preserve the detail of the artwork, but change the color of it. I think the best example of this is when I use my ProCreate watercolor brush or acrylic brush HERE. I don’t want to lose the detail and style/texture of the brush (which happens when vectorizing) so instead, I choose to create a high-resolution photoshop brush. See the breakdown below!
THE TUTORIAL
STEP ONE: With a transparent background image (aka: a transparent background .png from procreate or a cleaned up scanned version) open up in photoshop. I recommend the artwork to be at least 2,500px.
STEP TWO: Go to ‘LAYER‘ — ‘NEW LAYER‘ — Make that layer white (Paint bucket) and place it below/underneath the artwork layer.
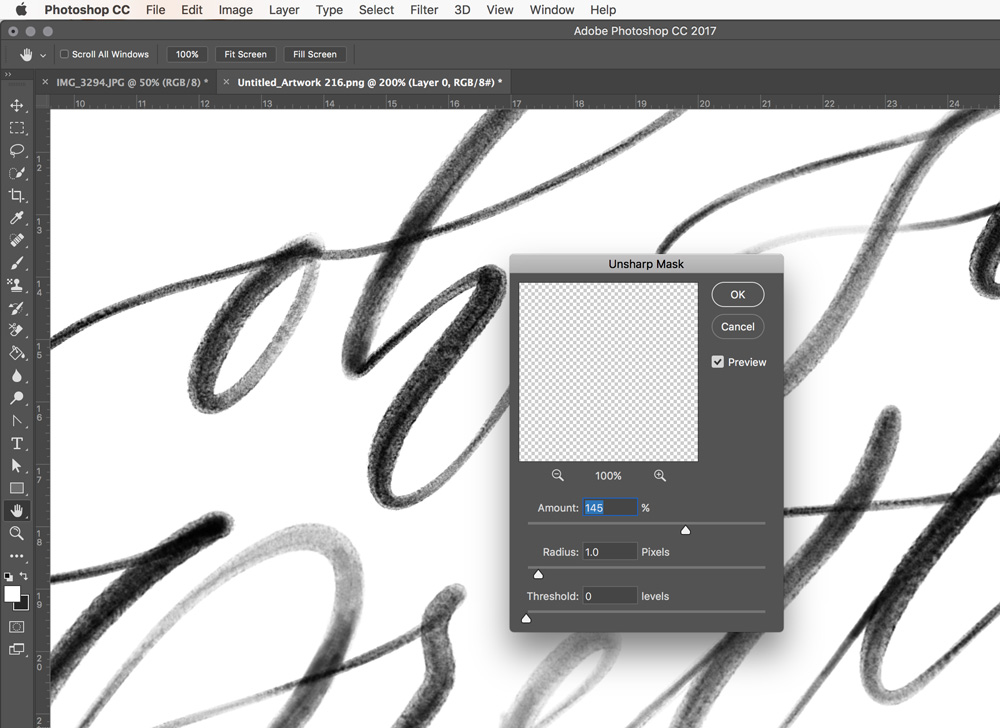
STEP THREE: With the artwork layer selected go to ‘FILTER‘ — ‘SHARPEN‘ — ‘UNSHARP MASK‘ (this will make the artwork crisp and sharp).
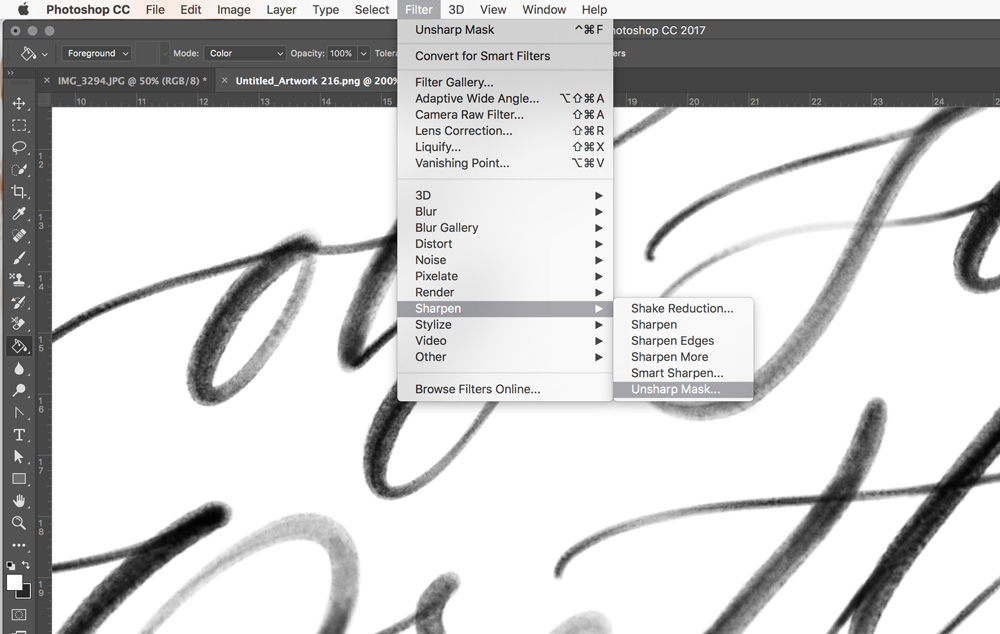
Note: If your artwork is similar in size to mine (around 2,300px) you can use the same settings below for the Unsharp Mask.
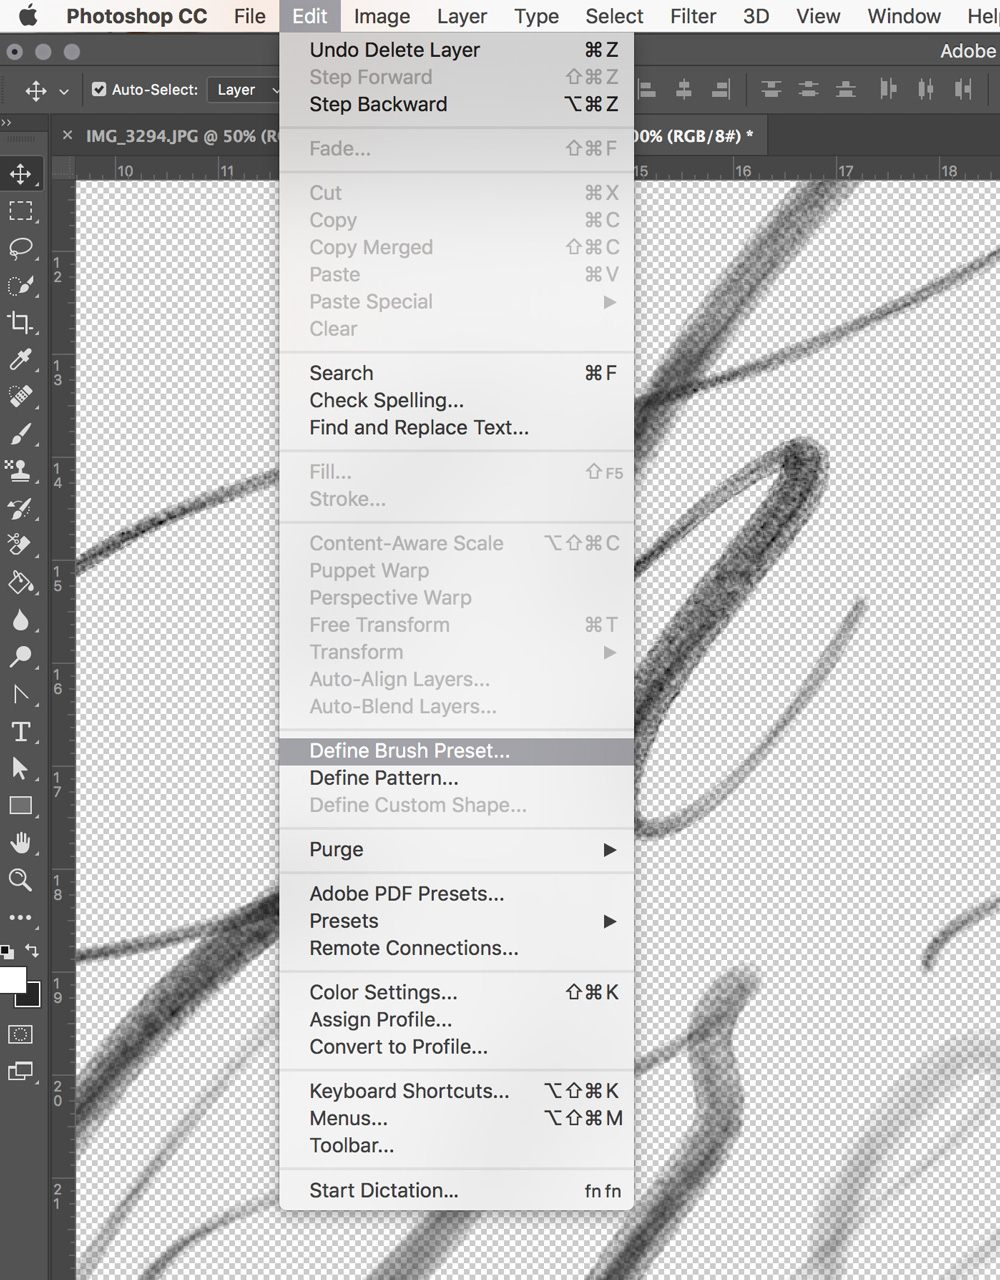
STEP FOUR: You can DELETE the white bottom layer and clean up any details in the artwork (erase, fill in, etc)
STEP FIVE: Go to ‘EDIT‘ — ‘DEFINE BRUSH PRESET‘ and name your new brush.
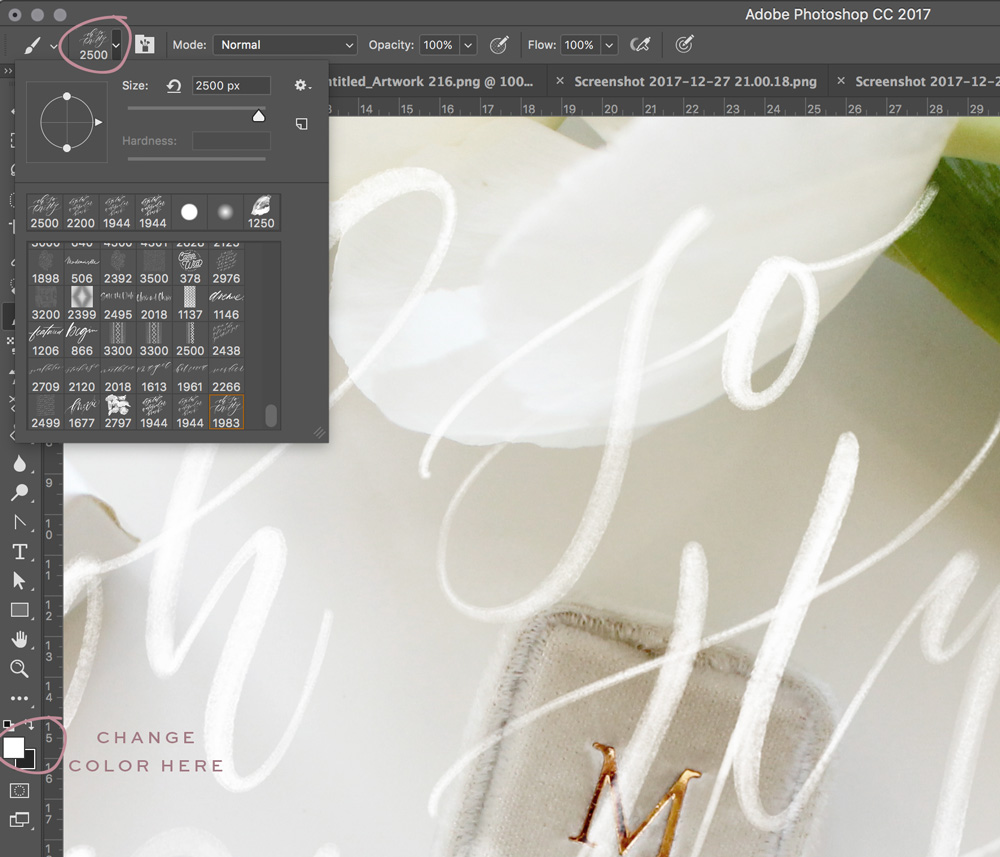
STEP SIX: With the new brush you can apply it to images or other graphics within Photoshop. Go up to ‘BRUSHES‘ select the brush you made, change the size or color, create a NEW LAYER, and stamp the brush.
Let me know if that helps and if you have any other questions, I’d love to help out!