

Goodmorning, I thought I’d start this Thursday off with a cute do it yourself save the date. Below you’ll find the template and the directions. Feel free to head over to The Knotty Bride for a full description of the d.i.y. Enjoy!
Materials ::
° white cardstock (to print on) and colored cardstock (I used mustard yellow & grey)
° metal-edge ruler
° x-acto knife
° pencil
° bone folder
° fine, decorative paper (I purchased mine from Paper Source and they have a great selection of fine papers)
° PVA glue or paper glue (I also got this from Paper Source and it is specifically for paper and bookbinding. I think Mod Podge glue would also work & that can be found at local craft stores)
° sponge brush
° printer
° sewing machine
° design software like Photoshop or Illustrator (create your own design or you can start with my template)
° thread in complimentary colors to your cardstock
° washi tape or drafting tape for temporarily positioning paper
Fonts ::
° Anivers – free from Font Squirrel
° Museo Slab – free from Font Squirrel
° Museo – free from Font Squirrel

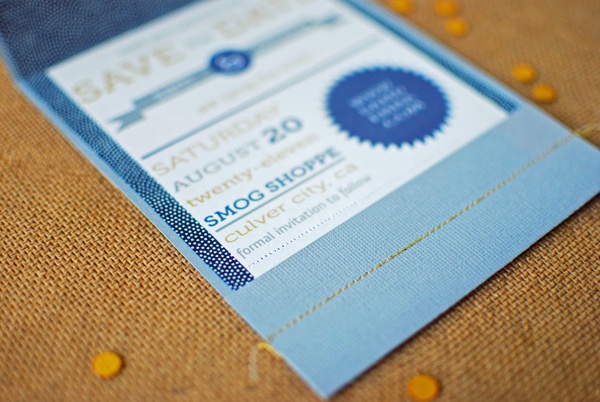
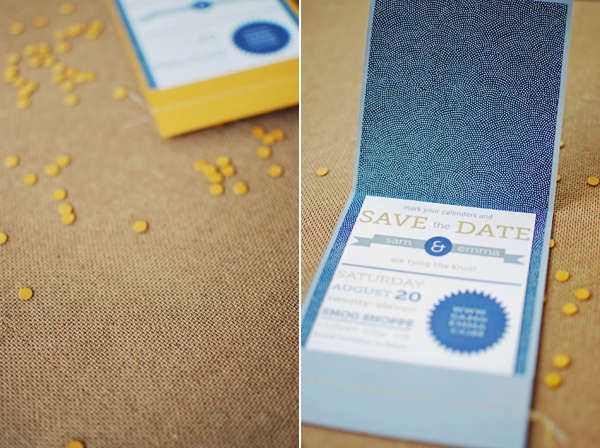
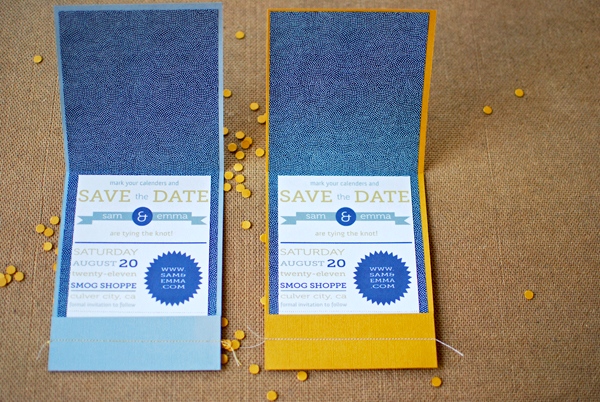
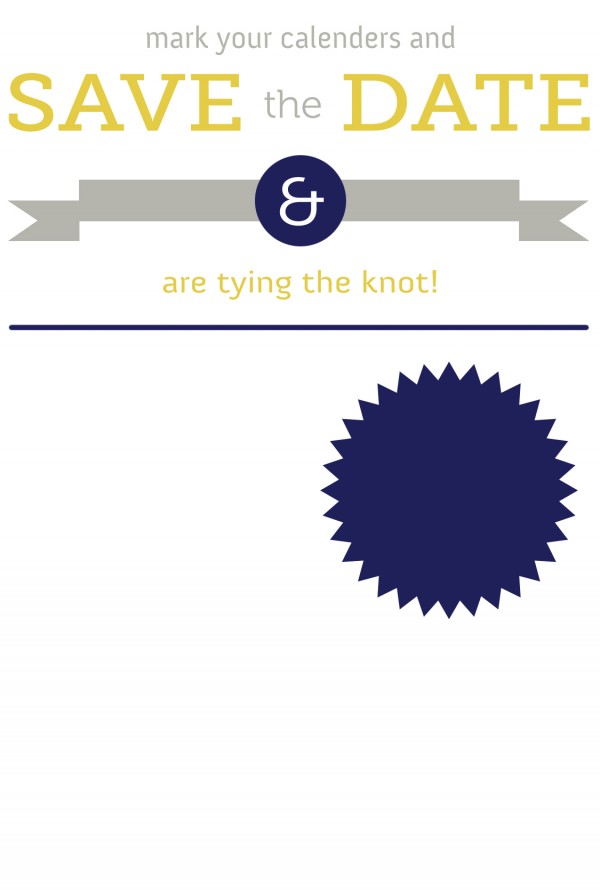
° Start with the provided template and personalize it or create your own original design in a program like Photoshop. The template is 3 ¼” wide x 5 9/16” tall. Do not put any text or graphics in the bottom 1 ½” of space because it will be covered up. The fonts I used were Anivers, Museo, & Museo Slab, all free fonts.
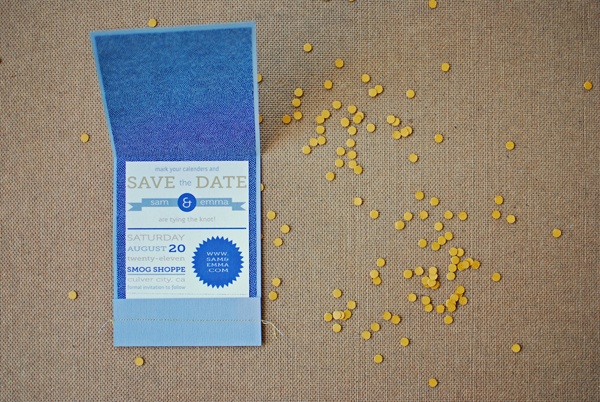
° Cut out your envelope from the cardstock, sized at 12” x 4 ½” {image A}. At one end, create a mark at 1 ½” {image B} and fold up a tab at that point {image C}. At the other end, mark 4 ¾” and fold and make a tab there. So the two tabs should now fold up and form a matchbook shape {image D}.
° Cut some of the fine, decorative paper, sized at 10 3/8” x 4 ¼” {image E}. Use a sponge brush to spread PVA glue onto the back of the fine paper {image F}. The glue dries quickly so immediately position the fine paper over the cardstock and press down. Use a bone folder to smooth out the paper {image G}. Leave the 1 ½” tab free from decorative paper as shown {image H}.
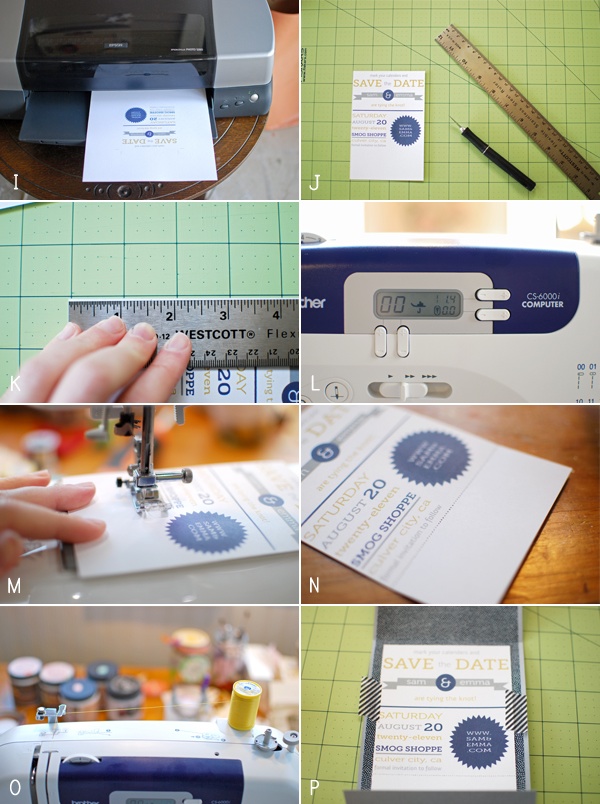
° Print out your save the date design {image I} and cut it down to size {image J}. From the bottom, pencil a mark at 1 5/8” as a guide {image K}. Now prepare your sewing machine. You can use your sewing machine to create a perforated line, like a ticket stub, so that the save the date could be ripped out from the envelope. You will want to remove the upper and lower thread so only the needle will be passing through the paper. Adjust your stitch length, I set mine to 1.4 as opposed to the normal 2.0 {image L}. Line your needle up to the 1 5/8” mark and slowly run the paper through the machine, trying to stay as straight as possible {image M}. Once done, you will be left with a perforated line that will leave a clean tear {image N}.
° Replace the upper and lower thread into your sewing machine {image O} and reset the stitch length. I used a yellow thread for the grey envelopes and a white thread for the yellow envelopes. Place your save the date into the envelope and temporarily hold in position with some washi tape or non-sticky tape {image P}. Fold up the 1 ½” tab over the save the date and then run through your sewing machine. This will secure the save the date and envelope together. Once finished, remove the washi tape and trim any excess thread.
If you click on my affiliates/products/advertisers links, I may receive a tiny commission. P.S. the products that I share are the ones I believe in.


I love this! very, very nice