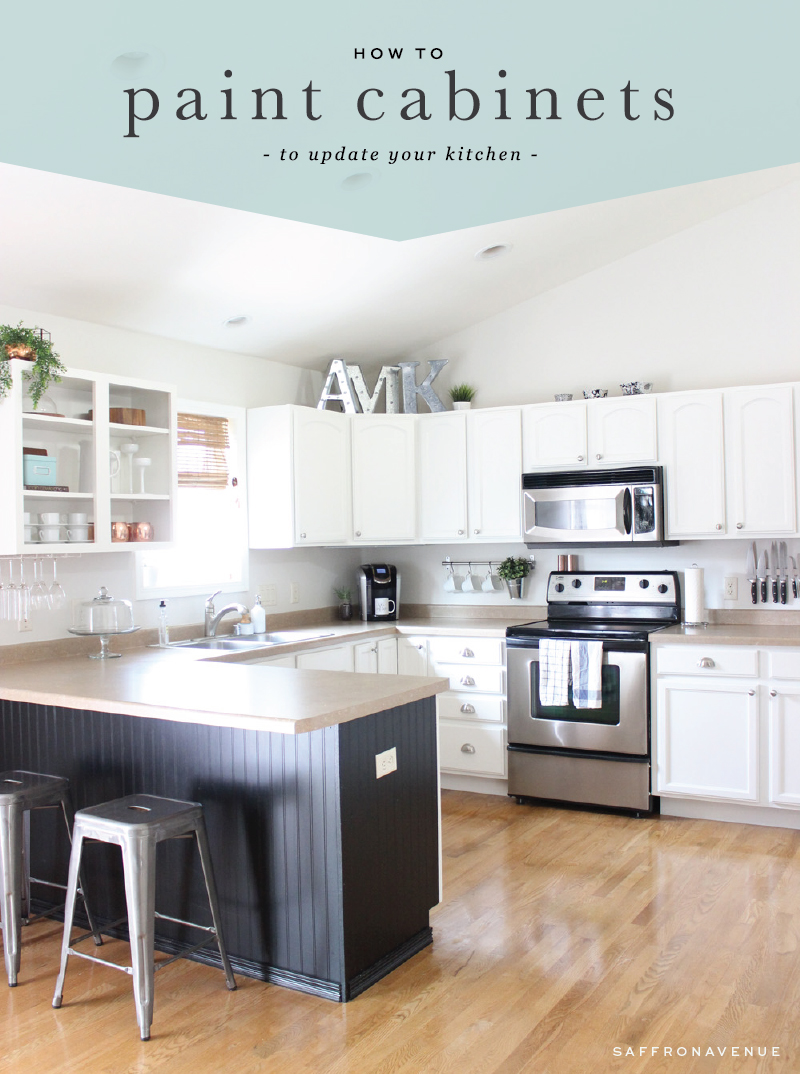
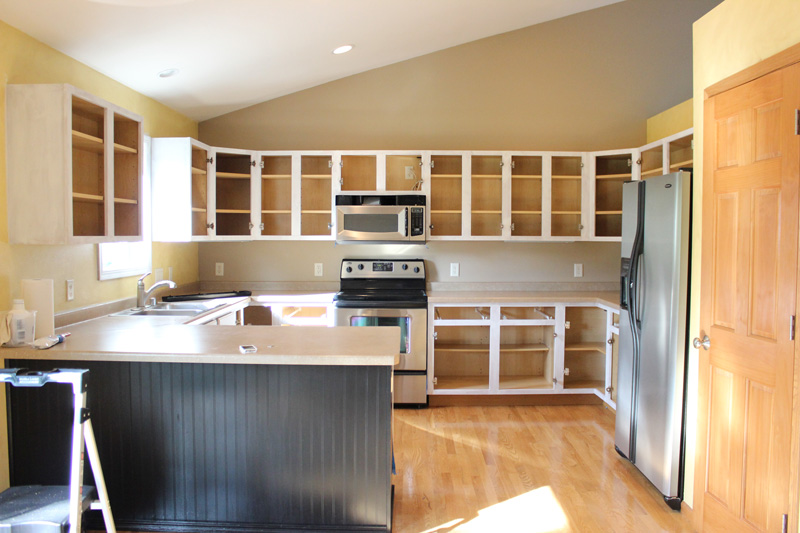
Hi friends, I received a lot of inquiries about how we went about painting our kitchen cabinets white, so here is peek into our process. I’m going to start out by saying that people recommend not tackling this type of project if it’s your first paint project. Well, that’s what we did and I now understand why…because it is a lot of work and a bit of a learning curve.
SUPPLIES
PRIMER : Zinsser Cover Stain Primer (oil-based is reommended)- 1 gallon ($16 here)
PAINT : Benjamin Moore Satin Impervo Waterborne in White Dove (which is amazing) – We a little over 1 gallon ($70 here) — NOTE: They, unfortunately, discontinue that and now have ADVANCE here in Satin which took us at least 4 coats…
CLEANER : TSP Liquid Cleaner ($5.50 here)
LIQUID SANDER : Liquid Sandpaper/Deglosser ($6 here)
SAND PAPER : We used 100 medium grit to start and from there on 220 fine grit ($4 here and here)
TACK CLOTH : Sticky cloth to pick up dust after sanding ($3 here)
TAPE : Painters tape ($6 here)
WOOD FILLER : Just in case ($6 here)
BRUSHES :
- PRIMER : we used cheap ones, I think similar to this kind ($3 here) (we didn’t wash them out after using, either put in a ziplock to re-use or threw them away..oil base sucks to clean out of brushes).
- PAINT : Highly, highly recommend wooster brushes ($5.50 here)
ROLLER : For the paint we used little rollers, ($3 here and this one $5 here)
PATIENCE : Because you may need it

OUR PROCESS
- CLEAN : While cabinets, doors, drawers are still on I cleaned them with all with TSP cleaner (per directions for removing oil/grease/etc).
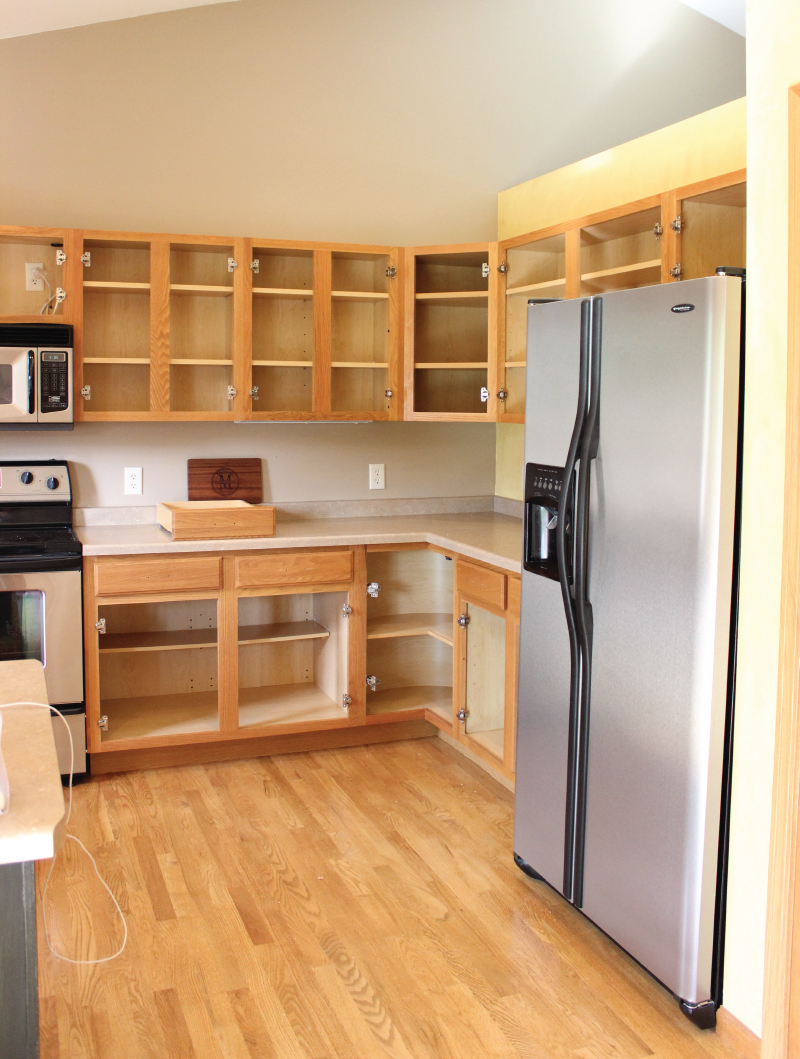
- REMOVE : Remove cabinet hardware, doors, drawers. We just took off the doors, and left the door hinges on the cabinets, but removed the hardware knobs and handles. Make sure when you remove each door to put a number inside where the hinge was and cover with tape..that way you know where the door goes when finished! We started from the left top, and counted around.
Here’s what we did in our new home (printed a pic with the numbers and then labeled the doors/drawers accordingly with arrows).
TAPE : We taped around the appliances and floor, since we were painting the walls and trim we didn’t have to tape it off ;)
3. FILL : Patch + Fill : Since I was going to do new drawer/door hardware we removed them all (even though we ended up using the original knobs)

4. SAND : We hand-sanded 100grit the cabinets, drawers, and doors, then used the tack cloth and vacuum to remove the dust
5. LIQUID SANDER : Just to be safe we then de-glossed the doors and drawers with liquid sander (gives it a more gritty feel too)
6. PRIME : We setup all the doors on some 2×2 wood (easier for grabbing, arranging, etc). We did one side, all 28 of them + 9 drawers..felt like it took years (and it was only one side of priming)! We have Oak cabinets and some say that oak grain comes through quite a bit. I’ve read you can use DryDex Spackling to smooth it out, but that’s an extra step I did not want to do. We took the risk and only did one coat of primer and just did 2 coats of paint…and prayed it would look good (it did :)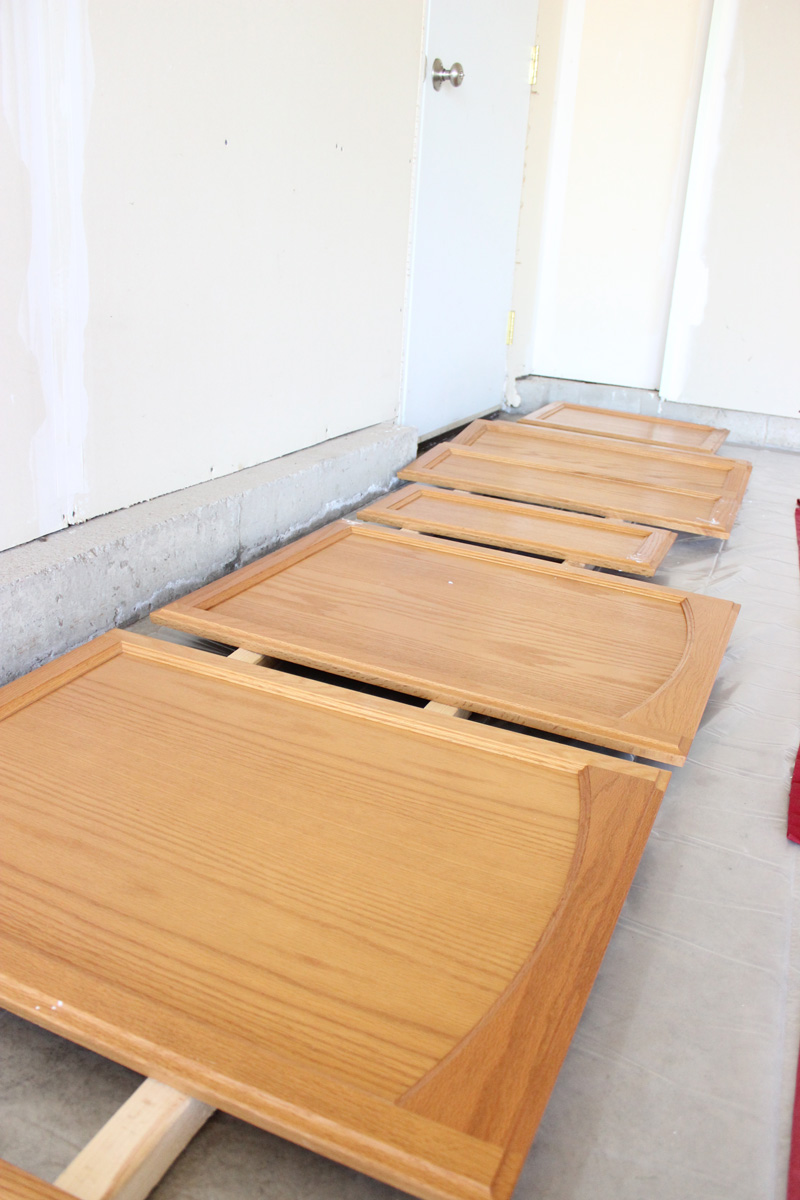
- Once we finished the one side of the doors we did the kitchen. I used a smaller brush to paint around the hinges, while my husband worked on painting the frames. We DID NOT do the inside of them, except for the open cabinet..it would be way too much work. We also did not paint the tops and bottom of the upper cabinets…we may in the future though, as you can see the top of them coming down the stairs.
- Once finished inside the kitchen we went back out and would paint the other side of the doors.

7. SAND : After you prime the drawers, the cabinets, and both sides of the doors we used the 220grit sandpaper to smooth out the brush strokes. Again, use tack cloth and a shop vac to remove all dust.
8. PAINT : We did the same process, did one side of the doors, did a coat on drawers, did the cabinets in the kitchen, and then again did the other side of the doors.
-
- DOORS : We used the wooster brush (go with the grain). Right after brushing we used the small rollers over top of it (to give it that sprayed look, and to remove any brush strokes).
- DRAWERS : Since we didn’t paint the inside we just had the front, so those were pretty easy
- CABINET : We did the same, brush on paint, then roll with foam roller…where we could (since we did leave the hinges on).
8. SAND : We did one final light sand on the first coat of paint, again use the tack cloth to remove any dust.
9. PAINT x2 : This was our final coat of paint, so on the doors we did the back side first (so when we flipped it to do the next side, the back would be on the bottom, in case it left any marks from sitting on the 2″x2″ boards), painted the drawers, and then did the final coat on the cabinets in the kitchen.’
10. CURE : We let is cure for 5 days to harden and set the paint, they say you should do this just in case you hit it while trying to put them up.
11. ASSEMBLE : Now it was time to put them back up! Which was pretty easy considering we had the hinges on, we simply had to just attach doors and screw back in. We kept the same brushed nickel knobs and bought new pulls for the drawer. 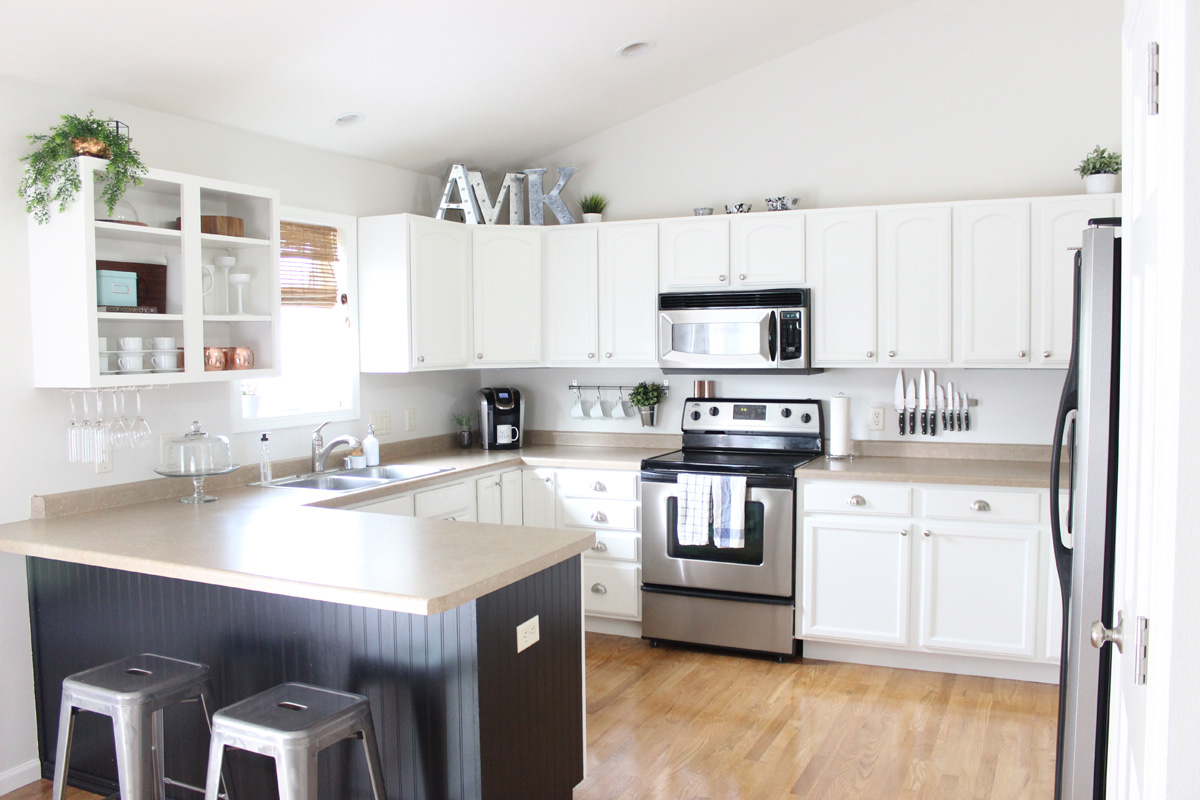
STEP BY STEP
- Clean with TSP
- Remove doors/drawers/hardware and label
- Patch any holes
- Sand
- De-gloss or liquid sand
- Prime 1
- Sand
- Paint 1
- Paint 2
- Cure for 5 days
- Finished (After 3 weeks)
I hope this makes sense, but if you have any questions let me know..or if I seemed to miss a step!
If you click on my affiliates/products/advertisers links, I may receive a tiny commission. P.S. the products that I share are the ones I believe in.


You have more patience than I! But it turned out so lovely and you have to be so proud of all your work!
Yes, patience is a must! And thank you, it’s definitely well worth it!~
Thank you SO much for this, Angela! Filing it away on my Pinterest board for future reference in a few months! I’ll let you know how it goes! xo
Yes, please do!
This is beautiful. What color did you paint the inside of the peninsula? I’m assuming white, but did you debate painting that inside run the accent color? Thank you!
Yeah, we did white on that other side ;) The peninsula was actually already painted when we moved in, so we didn’t have the color anyway!